Rating

Role and current-cycle team ratings use open gcsim simulations from the KQM database and our own runs. Roles are rated separately.

Tier list

5★ constellations and the best 5★ weapon from the guide (R1): team damage gain from our gcsim simulations

Rows show score tiers; columns show roles. Select a character to see why they are here.

CarrySub-DPSSupportSustain
T0
T0.5
T1
T1.5
T2
T3
T4

T0 100 · Carry

133.1K DPS

Simulation: 100

Tier lists: 98 (Prydwen T0 · WotPack S+)

simulation

Limit 19.5M

More details in the list

T0 97 · Carry

Tier lists: 96 (Prydwen T0 · WotPack S+ · Game8/PG 92 ↗↗)

Нет в базе KQM; оценка по тир-листам: SS — 92, S — 82, A — 72, B — 60

More details in the list

T0 97 · Carry

Tier lists: 96 (Prydwen T0 · WotPack S+ · Game8/PG 92 ↗↗)

Нет в базе KQM; оценка по тир-листам: SS — 92, S — 82, A — 72, B — 60

More details in the list

T0 95 · Carry

Tier lists: 94 (Prydwen T0 · WotPack S+ · Game8/PG 87 ↗↗)

Нет в базе KQM; оценка по тир-листам: SS — 92, S — 82, A — 72, B — 60

More details in the list

T0.5 93 · Carry

Tier lists: 92 (Prydwen T0.5 · WotPack S+ · Game8/PG 87 ↗↗)

Нет в базе KQM; оценка по тир-листам: SS — 92, S — 82, A — 72, B — 60

More details in the list

T0.5 93 · Carry

Tier lists: 92 (Prydwen T0.5 · WotPack S+ · Game8/PG 87 ↗↗)

Нет в базе KQM; оценка по тир-листам: SS — 92, S — 82, A — 72, B — 60

More details in the list

T0.5 89 · Carry

112.78K DPS

Simulation: 85

Tier lists: 94 (Prydwen T0.5 · WotPack S+)

simulation

More details in the list

T0.5 88 · Carry

Tier lists: 87 (Prydwen T1.5 · WotPack S+)

More details in the list

T1 86 · Carry

105.97K DPS

Simulation: 80

Tier lists: 94 (Prydwen T0.5 · WotPack S+)

simulation

More details in the list

T1 83 · Carry

Tier lists: 82 (Prydwen T1.5 · WotPack S)

More details in the list

T1 82 · Carry

Tier lists: 81 (Prydwen T1 · WotPack A · Game8/PG 82 ↗↗)

Нет в базе KQM; оценка по тир-листам: SS — 92, S — 82, A — 72, B — 60

More details in the list

T1 81 · Carry

110.77K DPS

Simulation: 83

Tier lists: 77 (Prydwen T1.5 · WotPack A)

simulation

Limit 4.4M

More details in the list

T1.5 79 · Carry

97.67K DPS

Simulation: 73

Tier lists: 86 (Prydwen T1 · WotPack S)

simulation

Limit 11.1M

More details in the list

T1.5 76 · Carry

93.84K DPS

Simulation: 71

Tier lists: 81 (Prydwen T1 · WotPack A)

simulation

Limit 12.3M

More details in the list

T1.5 72 · Carry

80.74K DPS

Simulation: 61

Tier lists: 86 (Prydwen T1 · WotPack S)

simulation

Limit 3.9M

More details in the list

T1.5 71 · Carry

90.86K DPS

Simulation: 68

Tier lists: 73 (Prydwen T2 · WotPack A)

simulation

More details in the list

T1.5 70 · Carry

76.57K DPS

Simulation: 58

Tier lists: 86 (Prydwen T1 · WotPack S)

simulation

More details in the list

T2 67 · Carry

78.26K DPS

Simulation: 59

Tier lists: 77 (Prydwen T1.5 · WotPack A)

simulation

Limit 3.3M

More details in the list

T2 66 · Carry

61.19K DPS

Simulation: 46

Tier lists: 94 (Prydwen T0.5 · WotPack S+)

simulation

More details in the list

T2 64 · Carry

72.03K DPS

Simulation: 54

Tier lists: 77 (Prydwen T1.5 · WotPack A)

simulation

Limit 791K

More details in the list

T2 60 · Carry

86.44K DPS

Simulation: 65

Tier lists: 50 (Prydwen T4 · WotPack C)

simulation

Limit 8.2M

More details in the list

T2 60 · Carry

86.2K DPS

Simulation: 65

Tier lists: 50 (Prydwen T4 · WotPack C)

simulation

More details in the list

T2 59 · Carry

70.69K DPS

Simulation: 53

Tier lists: 66 (Prydwen T2 · WotPack B)

simulation

Limit 531K

More details in the list

T2 58 · Carry

60.22K DPS

Simulation: 45

Tier lists: 77 (Prydwen T1.5 · WotPack A)

simulation

Limit 3.3M

More details in the list

T2 57 · Carry

71.93K DPS

Simulation: 54

Tier lists: 61 (Prydwen T3 · WotPack B)

simulation

Limit 3.6M

More details in the list

T2 57 · Carry

Tier lists: 56 (Prydwen T4 · WotPack B)

More details in the list

T2 56 · Carry

64.6K DPS

Simulation: 49

Tier lists: 66 (Prydwen T2 · WotPack B)

simulation

Limit 1.2M

More details in the list

T2 56 · Carry

Tier lists: 55 (Prydwen T3 · WotPack C)

More details in the list

T2 55 · Carry

52.75K DPS

Simulation: 40

Tier lists: 75 (WotPack A)

simulation

comfortable healing

Limit 1.8M

More details in the list

T3 54 · Carry

35.36K DPS

Simulation: 27

Tier lists: 94 (Prydwen T0.5 · WotPack S+)

simulation

Limit 497K

More details in the list

T3 53 · Carry

47.75K DPS

Simulation: 36

Tier lists: 78 (Prydwen T2 · WotPack S)

simulation

More details in the list

T3 52 · Carry

38.84K DPS

Simulation: 29

Tier lists: 86 (Prydwen T1 · WotPack S)

simulation

More details in the list

T3 52 · Carry

30.67K DPS

Simulation: 23

Tier lists: 95 (WotPack S+)

simulation

Limit 720K

More details in the list

T3 51 · Carry

Tier lists: 50 (Prydwen T4 · WotPack C)

More details in the list

T3 51 · Carry

Tier lists: 50 (Prydwen T4 · WotPack C)

enough healing

More details in the list

T3 51 · Carry

Tier lists: 50 (Prydwen T4 · WotPack C)

More details in the list

T3 49 · Carry

40.19K DPS

Simulation: 30

Tier lists: 77 (Prydwen T1.5 · WotPack A)

simulation

Limit 4.4M

More details in the list

T3 45 · Carry

43.62K DPS

Simulation: 33

Tier lists: 61 (Prydwen T3 · WotPack B)

simulation

More details in the list

T3 45 · Carry

39.65K DPS

Simulation: 30

Tier lists: 68 (Prydwen T3 · WotPack A)

simulation

More details in the list

T3 42 · Carry

37.14K DPS

Simulation: 28

Tier lists: 61 (Prydwen T3 · WotPack B)

simulation

More details in the list

T3 42 · Carry

33.67K DPS

Simulation: 25

Tier lists: 66 (Prydwen T2 · WotPack B)

simulation

enough healing and shield

More details in the list

Ifa

T3 42 · Carry

32.62K DPS

Simulation: 25

Tier lists: 66 (Prydwen T2 · WotPack B)

simulation

enough healing

More details in the list

T3 40 · Carry

Tier lists: 40 (Prydwen T5 · WotPack D)

More details in the list

T3 40 · Carry

Tier lists: 40 (Prydwen T5 · WotPack D)

low shield

More details in the list

T4 39 · Carry

36.99K DPS

Simulation: 28

Tier lists: 55 (Prydwen T3 · WotPack C)

simulation

More details in the list

T4 39 · Carry

31.71K DPS

Simulation: 24

Tier lists: 61 (Prydwen T3 · WotPack B)

simulation

Limit 1.6M

More details in the list

T4 37 · Carry

32.51K DPS

Simulation: 24

Tier lists: 56 (Prydwen T4 · WotPack B)

simulation

More details in the list

T4 36 · Carry

29.85K DPS

Simulation: 22

Tier lists: 56 (Prydwen T4 · WotPack B)

simulation

More details in the list

T4 28 · Carry

26.47K DPS

Simulation: 20

Tier lists: 40 (Prydwen T5 · WotPack D)

simulation

More details in the list

T0 100 · Sub-DPS

64.63K DPS

Simulation: 100

Tier lists: 94 (Prydwen T0.5 · WotPack S+)

simulation

More details in the list

T0 98 · Sub-DPS

Tier lists: 96 (Prydwen T0 · WotPack S+ · Game8/PG 92 ↗↗)

Нет в базе KQM; оценка по тир-листам: SS — 92, S — 82, A — 72, B — 60

More details in the list

T0 97 · Sub-DPS

Tier lists: 95 (Prydwen T0 · WotPack S+ · Game8/PG 90 ↗↗)

Нет в базе KQM; оценка по тир-листам: SS — 92, S — 82, A — 72, B — 60

More details in the list

T0.5 91 · Sub-DPS

55.15K DPS

Simulation: 85

Tier lists: 94 (Prydwen T0.5 · WotPack S+)

simulation

More details in the list

T0.5 88 · Sub-DPS

Tier lists: 86 (Prydwen T1 · WotPack S)

More details in the list

T1 84 · Sub-DPS

Tier lists: 82 (Prydwen T1.5 · WotPack S)

More details in the list

T1 83 · Sub-DPS

55.59K DPS

Simulation: 86

Tier lists: 73 (Prydwen T2 · WotPack A)

simulation

Limit 2.2M

More details in the list

T1 80 · Sub-DPS

51.1K DPS

Simulation: 79

Tier lists: 77 (Prydwen T1.5 · WotPack A)

simulation

Limit 2.6M

More details in the list

T1.5 77 · Sub-DPS

39.47K DPS

Simulation: 61

Tier lists: 98 (Prydwen T0 · WotPack S+)

simulation

More details in the list

T1.5 76 · Sub-DPS

41.11K DPS

Simulation: 64

Tier lists: 89 (Prydwen T0.5 · WotPack S)

simulation

More details in the list

T1.5 74 · Sub-DPS

Tier lists: 73 (Prydwen T2 · WotPack A)

More details in the list

T2 67 · Sub-DPS

28.77K DPS

Simulation: 45

Tier lists: 95 (WotPack S+)

simulation

Limit 3M

More details in the list

T2 66 · Sub-DPS

32.64K DPS

Simulation: 51

Tier lists: 85 (WotPack S)

simulation

More details in the list

T2 65 · Sub-DPS

36.94K DPS

Simulation: 57

Tier lists: 73 (Prydwen T2 · WotPack A)

simulation

enough healing

More details in the list

T2 63 · Sub-DPS

33.43K DPS

Simulation: 52

Tier lists: 75 (WotPack A)

simulation

More details in the list

T2 63 · Sub-DPS

Tier lists: 61 (Prydwen T3 · WotPack B)

enough shield

More details in the list

T2 61 · Sub-DPS

26.9K DPS

Simulation: 42

Tier lists: 86 (Prydwen T1 · WotPack S)

simulation

enough healing

Limit 4.5M

More details in the list

T2 60 · Sub-DPS

27.52K DPS

Simulation: 43

Tier lists: 82 (Prydwen T1.5 · WotPack S)

simulation

Limit 3.5M

More details in the list

T2 59 · Sub-DPS

27.74K DPS

Simulation: 43

Tier lists: 81 (Prydwen T1 · WotPack A)

simulation

Limit 1.1M

More details in the list

T2 59 · Sub-DPS

25.51K DPS

Simulation: 39

Tier lists: 85 (WotPack S)

simulation

More details in the list

T2 59 · Sub-DPS

21.46K DPS

Simulation: 33

Tier lists: 94 (Prydwen T0.5 · WotPack S+)

simulation

enough healing

More details in the list

T2 57 · Sub-DPS

18.15K DPS

Simulation: 28

Tier lists: 98 (Prydwen T0 · WotPack S+)

simulation

Limit 720K

More details in the list

T2 56 · Sub-DPS

Tier lists: 55 (WotPack C · Game8/PG 60 ↗↗)

Нет в базе KQM; оценка по тир-листам: SS — 92, S — 82, A — 72, B — 60

More details in the list

T2 56 · Sub-DPS

Tier lists: 55 (Prydwen T3 · WotPack C)

comfortable healing

More details in the list

T2 56 · Sub-DPS

Tier lists: 55 (Prydwen T3 · WotPack C)

More details in the list

T3 54 · Sub-DPS

23.27K DPS

Simulation: 36

Tier lists: 77 (Prydwen T1.5 · WotPack A)

simulation

More details in the list

T3 53 · Sub-DPS

23.96K DPS

Simulation: 37

Tier lists: 75 (WotPack A)

simulation

More details in the list

T3 52 · Sub-DPS

22.7K DPS

Simulation: 35

Tier lists: 75 (WotPack A)

simulation

More details in the list

T3 52 · Sub-DPS

22.23K DPS

Simulation: 34

Tier lists: 75 (WotPack A)

simulation

comfortable shield

Limit 1.5M

More details in the list

T3 50 · Sub-DPS

18.4K DPS

Simulation: 28

Tier lists: 81 (Prydwen T1 · WotPack A)

simulation

More details in the list

T3 49 · Sub-DPS

20.79K DPS

Simulation: 32

Tier lists: 73 (Prydwen T2 · WotPack A)

simulation

comfortable healing

Limit 1.8M

More details in the list

T3 49 · Sub-DPS

10.67K DPS

Simulation: 17

Tier lists: 95 (WotPack S+)

simulation

More details in the list

T3 45 · Sub-DPS

14.72K DPS

Simulation: 23

Tier lists: 75 (WotPack A)

simulation

enough shield

More details in the list

T3 44 · Sub-DPS

24.56K DPS

Simulation: 38

Tier lists: 50 (WotPack C)

simulation

enough healing

More details in the list

Ifa

T3 43 · Sub-DPS

18.91K DPS

Simulation: 29

Tier lists: 62 (WotPack B)

simulation

enough healing

More details in the list

T3 42 · Sub-DPS

22.48K DPS

Simulation: 35

Tier lists: 50 (WotPack C)

simulation

More details in the list

T3 41 · Sub-DPS

21.46K DPS

Simulation: 33

Tier lists: 50 (WotPack C)

simulation

More details in the list

T3 40 · Sub-DPS

15.45K DPS

Simulation: 24

Tier lists: 62 (WotPack B)

simulation

More details in the list

T4 39 · Sub-DPS

19.45K DPS

Simulation: 30

Tier lists: 50 (WotPack C)

simulation

More details in the list

T4 38 · Sub-DPS

13.31K DPS

Simulation: 21

Tier lists: 62 (WotPack B)

simulation

Limit 2.4M

More details in the list

T4 36 · Sub-DPS

11.84K DPS

Simulation: 18

Tier lists: 62 (WotPack B)

simulation

low shield

More details in the list

T4 33 · Sub-DPS

17.39K DPS

Simulation: 27

Tier lists: 40 (WotPack D)

simulation

More details in the list

T4 33 · Sub-DPS

13.36K DPS

Simulation: 21

Tier lists: 50 (WotPack C)

simulation

More details in the list

T4 26 · Sub-DPS

10.57K DPS

Simulation: 16

Tier lists: 40 (WotPack D)

simulation

More details in the list

T0 100 · Support

+30% to team damage across 188 swaps

Simulation: 100

Tier lists: 98 (Prydwen T0 · WotPack S+)

simulation

More details in the list

T0 96 · Support

+24% to team damage across 180 swaps

Simulation: 95

Tier lists: 94 (Prydwen T0.5 · WotPack S+)

simulation

More details in the list

T0 96 · Support

Tier lists: 95 (Prydwen T0 · WotPack S+ · Game8/PG 90 ↗↗)

Нет в базе KQM; оценка по тир-листам: SS — 92, S — 82, A — 72, B — 60

More details in the list

T0.5 94 · Support

+20% to team damage across 850 swaps

Simulation: 92

Tier lists: 95 (WotPack S+)

simulation

enough healing

More details in the list

T0.5 94 · Support

Tier lists: 94 (WotPack S+ · Game8/PG 92 ↗↗)

Нет в базе KQM; оценка по тир-листам: SS — 92, S — 82, A — 72, B — 60

More details in the list

T0.5 93 · Support

Tier lists: 93 (WotPack S+ · Game8/PG 90 ↗↗)

Нет в базе KQM; оценка по тир-листам: SS — 92, S — 82, A — 72, B — 60

More details in the list

T0.5 91 · Support

+14% to team damage across 443 swaps

Simulation: 88

Tier lists: 94 (Prydwen T0.5 · WotPack S+)

simulation

low healing

Limit 3.6M

More details in the list

T0.5 91 · Support

+10% to team damage across 600 swaps

Simulation: 85

Tier lists: 98 (Prydwen T0 · WotPack S+)

simulation

More details in the list

T0.5 91 · Support

Tier lists: 90 (Prydwen T0 · WotPack S · Game8/PG 85 ↗↗)

enough healing

Нет в базе KQM; оценка по тир-листам: SS — 92, S — 82, A — 72, B — 60

More details in the list

T0.5 90 · Support

+22% to team damage across 53 swaps

Simulation: 94

Tier lists: 82 (Prydwen T1.5 · WotPack S)

simulation

More details in the list

T0.5 90 · Support

+11% to team damage across 738 swaps

Simulation: 86

Tier lists: 94 (Prydwen T0.5 · WotPack S+)

simulation

enough shield

Limit 6.1M

More details in the list

T0.5 88 · Support

+14% to team damage across 1,095 swaps

Simulation: 88

Tier lists: 86 (Prydwen T1 · WotPack S)

simulation

enough healing

Limit 1.6M

More details in the list

T0.5 88 · Support

+7% to team damage across 1,276 swaps

Simulation: 83

Tier lists: 94 (Prydwen T0.5 · WotPack S+)

simulation

comfortable healing

Limit 2.1M

More details in the list

T1 87 · Support

+13% to team damage across 1,424 swaps

Simulation: 87

Tier lists: 85 (WotPack S)

simulation

Limit 3.5M

More details in the list

T1 86 · Support

+6% to team damage across 199 swaps

Simulation: 82

Tier lists: 89 (Prydwen T0.5 · WotPack S)

simulation

More details in the list

T1 86 · Support

+3% to team damage across 314 swaps

Simulation: 79

Tier lists: 95 (WotPack S+)

simulation

Limit 3M

More details in the list

T1 84 · Support

+6% to team damage across 237 swaps

Simulation: 82

Tier lists: 85 (WotPack S)

simulation

More details in the list

T1 83 · Support

+13% to team damage across 298 swaps

Simulation: 87

Tier lists: 75 (WotPack A)

simulation

Limit 1.8M

More details in the list

T1 83 · Support

−5% to team damage across 220 swaps

Simulation: 73

Tier lists: 95 (WotPack S+)

simulation

Limit 497K

More details in the list

T1 82 · Support

+8% to team damage across 854 swaps

Simulation: 84

Tier lists: 77 (Prydwen T1.5 · WotPack A)

simulation

Limit 729K

More details in the list

T1 82 · Support

Tier lists: 81 (Prydwen T1.5 · WotPack S · Game8/PG 80 ↗↗)

Нет в базе KQM; оценка по тир-листам: SS — 92, S — 82, A — 72, B — 60

More details in the list

T1 81 · Support

+9% to team damage across 1,020 swaps

Simulation: 84

Tier lists: 75 (WotPack A)

simulation

Limit 2.6M

More details in the list

T1 81 · Support

−4% to team damage across 476 swaps

Simulation: 74

Tier lists: 89 (Prydwen T0.5 · WotPack S)

simulation

Limit 4.2M

More details in the list

T1 81 · Support

−8% to team damage across 39 swaps

Simulation: 71

Tier lists: 95 (WotPack S+)

simulation

More details in the list

T1 80 · Support

+8% to team damage across 805 swaps

Simulation: 83

Tier lists: 73 (Prydwen T2 · WotPack A)

simulation

enough healing

Limit 1.7M

More details in the list

T1 80 · Support

+7% to team damage across 593 swaps

Simulation: 82

Tier lists: 75 (WotPack A)

simulation

More details in the list

T1 80 · Support

+6% to team damage across 879 swaps

Simulation: 82

Tier lists: 75 (WotPack A)

simulation

Limit 953K

More details in the list

T1 80 · Support

+4% to team damage across 576 swaps

Simulation: 80

Tier lists: 77 (Prydwen T1.5 · WotPack A)

simulation

More details in the list

T1 80 · Support

+4% to team damage across 1,256 swaps

Simulation: 80

Tier lists: 77 (Prydwen T1.5 · WotPack A)

simulation

Limit 1.1M

More details in the list

T1.5 79 · Support

−4% to team damage across 318 swaps

Simulation: 74

Tier lists: 85 (WotPack S)

simulation

More details in the list

T1.5 79 · Support

Tier lists: 79 (Prydwen T1.5 · WotPack S · Game8/PG 72 ↗↗)

Нет в базе KQM; оценка по тир-листам: SS — 92, S — 82, A — 72, B — 60

More details in the list

T1.5 78 · Support

+6% to team damage across 10 swaps

Simulation: 82

Tier lists: 71 (Prydwen T1.5 · WotPack B)

simulation

enough healing

More details in the list

T1.5 78 · Support

+5% to team damage across 320 swaps

Simulation: 81

Tier lists: 71 (Prydwen T1.5 · WotPack B)

simulation

More details in the list

T1.5 78 · Support

+1% to team damage across 895 swaps

Simulation: 78

Tier lists: 75 (WotPack A)

simulation

More details in the list

T1.5 78 · Support

+1% to team damage across 27 swaps

Simulation: 78

Tier lists: 77 (Prydwen T1.5 · WotPack A)

simulation

More details in the list

T1.5 78 · Support

−6% to team damage across 114 swaps

Simulation: 72

Tier lists: 85 (WotPack S)

simulation

More details in the list

T1.5 78 · Support

Tier lists: 77 (Prydwen T1.5 · WotPack A)

More details in the list

T1.5 77 · Support

−2% to team damage across 1,015 swaps

Simulation: 76

Tier lists: 77 (Prydwen T1.5 · WotPack A)

simulation

comfortable shield

Limit 1.5M

More details in the list

T1.5 76 · Support

−7% to team damage across 364 swaps

Simulation: 72

Tier lists: 81 (Prydwen T1 · WotPack A)

simulation

enough healing and shield

More details in the list

T1.5 75 · Support

−3% to team damage across 425 swaps

Simulation: 75

Tier lists: 73 (Prydwen T2 · WotPack A)

simulation

enough shield

More details in the list

T1.5 75 · Support

−4% to team damage across 219 swaps

Simulation: 74

Tier lists: 74 (Prydwen T1 · WotPack B)

simulation

low shield

More details in the list

T1.5 75 · Support

−14% to team damage across 109 swaps

Simulation: 67

Tier lists: 86 (Prydwen T1 · WotPack S)

simulation

comfortable healing

Limit 1.7M

More details in the list

T1.5 74 · Support

+1% to team damage across 534 swaps

Simulation: 78

Tier lists: 66 (Prydwen T2 · WotPack B)

simulation

More details in the list

T1.5 74 · Support

−3% to team damage across 95 swaps

Simulation: 75

Tier lists: 71 (Prydwen T1.5 · WotPack B)

simulation

More details in the list

T1.5 74 · Support

−4% to team damage across 407 swaps

Simulation: 74

Tier lists: 73 (Prydwen T2 · WotPack A)

simulation

comfortable healing

More details in the list

T1.5 74 · Support

−6% to team damage across 423 swaps

Simulation: 73

Tier lists: 73 (Prydwen T2 · WotPack A)

simulation

comfortable healing

More details in the list

T1.5 73 · Support

+0% to team damage across 269 swaps

Simulation: 77

Tier lists: 66 (Prydwen T2 · WotPack B)

simulation

More details in the list

T1.5 73 · Support

−1% to team damage across 524 swaps

Simulation: 76

Tier lists: 68 (Prydwen T3 · WotPack A)

simulation

comfortable healing and shield

More details in the list

T1.5 73 · Support

Tier lists: 73 (Prydwen T2 · WotPack A)

enough healing

More details in the list

T1.5 72 · Support

+1% to team damage across 218 swaps

Simulation: 78

Tier lists: 62 (WotPack B)

simulation

More details in the list

T1.5 72 · Support

+1% to team damage across 403 swaps

Simulation: 78

Tier lists: 61 (Prydwen T3 · WotPack B)

simulation

enough shield

More details in the list

T1.5 72 · Support

−5% to team damage across 182 swaps

Simulation: 73

Tier lists: 68 (Prydwen T3 · WotPack A)

simulation

More details in the list

T1.5 72 · Support

−6% to team damage across 558 swaps

Simulation: 73

Tier lists: 68 (Prydwen T3 · WotPack A)

simulation

enough shield

More details in the list

T1.5 71 · Support

+0% to team damage across 234 swaps

Simulation: 77

Tier lists: 61 (Prydwen T3 · WotPack B)

simulation

comfortable healing

More details in the list

T1.5 71 · Support

−2% to team damage across 166 swaps

Simulation: 76

Tier lists: 61 (Prydwen T3 · WotPack B)

simulation

More details in the list

T1.5 71 · Support

−3% to team damage across 337 swaps

Simulation: 75

Tier lists: 62 (WotPack B)

simulation

Limit 2.4M

More details in the list

T1.5 70 · Support

−5% to team damage across 186 swaps

Simulation: 74

Tier lists: 63 (Prydwen T4 · WotPack A)

simulation

More details in the list

T1.5 70 · Support

−7% to team damage across 248 swaps

Simulation: 71

Tier lists: 68 (Prydwen T3 · WotPack A)

simulation

comfortable healing

More details in the list

T2 69 · Support

−5% to team damage across 185 swaps

Simulation: 73

Tier lists: 62 (WotPack B)

simulation

More details in the list

T2 68 · Support

+3% to team damage across 271 swaps

Simulation: 79

Tier lists: 50 (WotPack C)

simulation

More details in the list

T2 68 · Support

−1% to team damage across 175 swaps

Simulation: 76

Tier lists: 55 (Prydwen T3 · WotPack C)

simulation

enough shield

More details in the list

T2 68 · Support

Tier lists: 68 (Prydwen T3 · WotPack A)

comfortable healing

Limit 1.8M

More details in the list

T2 67 · Support

+1% to team damage across 582 swaps

Simulation: 78

Tier lists: 50 (Prydwen T4 · WotPack C)

simulation

Limit 1.4M

More details in the list

T2 67 · Support

+0% to team damage across 259 swaps

Simulation: 77

Tier lists: 50 (WotPack C)

simulation

enough healing

More details in the list

T2 67 · Support

−4% to team damage across 417 swaps

Simulation: 74

Tier lists: 55 (Prydwen T3 · WotPack C)

simulation

More details in the list

T2 67 · Support

−5% to team damage across 316 swaps

Simulation: 74

Tier lists: 56 (Prydwen T4 · WotPack B)

simulation

enough shield

More details in the list

T2 67 · Support

−5% to team damage across 194 swaps

Simulation: 73

Tier lists: 56 (Prydwen T4 · WotPack B)

simulation

low healing

More details in the list

T2 67 · Support

−10% to team damage across 85 swaps

Simulation: 70

Tier lists: 62 (WotPack B)

simulation

Limit 1M

More details in the list

T2 66 · Support

−2% to team damage across 236 swaps

Simulation: 76

Tier lists: 50 (WotPack C)

simulation

Limit 8.2M

More details in the list

T2 66 · Support

−2% to team damage across 155 swaps

Simulation: 76

Tier lists: 50 (WotPack C)

simulation

Limit 1.5M

More details in the list

T2 66 · Support

−6% to team damage across 467 swaps

Simulation: 73

Tier lists: 55 (Prydwen T3 · WotPack C)

simulation

More details in the list

T2 66 · Support

−8% to team damage across 319 swaps

Simulation: 71

Tier lists: 56 (Prydwen T4 · WotPack B)

simulation

enough healing

More details in the list

T2 65 · Support

+0% to team damage across 90 swaps

Simulation: 77

Tier lists: 45 (Prydwen T4 · WotPack D)

simulation

More details in the list

T2 65 · Support

−10% to team damage across 351 swaps

Simulation: 70

Tier lists: 55 (Prydwen T3 · WotPack C)

simulation

More details in the list

T2 64 · Support

−5% to team damage across 132 swaps

Simulation: 73

Tier lists: 50 (Prydwen T3 · WotPack D)

simulation

More details in the list

T2 63 · Support

−4% to team damage across 60 swaps

Simulation: 74

Tier lists: 45 (Prydwen T5 · WotPack C)

simulation

More details in the list

T2 63 · Support

−8% to team damage across 82 swaps

Simulation: 71

Tier lists: 50 (WotPack C)

simulation

More details in the list

T2 61 · Support

−14% to team damage across 130 swaps

Simulation: 67

Tier lists: 50 (Prydwen T4 · WotPack C)

simulation

comfortable healing

More details in the list

T2 61 · Support

Tier lists: 60 (Prydwen T2 · WotPack C)

More details in the list

T2 59 · Support

−9% to team damage across 64 swaps

Simulation: 70

Tier lists: 40 (WotPack D)

simulation

More details in the list

T2 58 · Support

−16% to team damage across 80 swaps

Simulation: 65

Tier lists: 45 (Prydwen T4 · WotPack D)

simulation

More details in the list

T2 57 · Support

−12% to team damage across 54 swaps

Simulation: 68

Tier lists: 40 (WotPack D)

simulation

Limit 2.5M

More details in the list

T2 57 · Support

−13% to team damage across 233 swaps

Simulation: 67

Tier lists: 40 (WotPack D)

simulation

low shield

More details in the list

T0.5 90 · Sustain

expert rating

comfortable healing

Limit 2.1M

More details in the list

T0.5 90 · Sustain

expert rating

comfortable healing

Limit 1.8M

More details in the list

T0.5 90 · Sustain

expert rating

comfortable healing and shield

More details in the list

T0.5 90 · Sustain

expert rating

comfortable healing

More details in the list

T0.5 90 · Sustain

expert rating

comfortable healing

More details in the list

T0.5 90 · Sustain

expert rating

comfortable healing

More details in the list

T0.5 90 · Sustain

expert rating

comfortable healing

More details in the list

T0.5 90 · Sustain

expert rating

comfortable healing

More details in the list

T0.5 90 · Sustain

expert rating

comfortable healing

Limit 1.7M

More details in the list

T0.5 90 · Sustain

expert rating

comfortable shield

Limit 1.5M

More details in the list

T1.5 75 · Sustain

expert rating

enough healing

Limit 4.5M

More details in the list

T1.5 75 · Sustain

expert rating

enough healing

Limit 1.7M

More details in the list

T1.5 75 · Sustain

expert rating

enough healing

More details in the list

T1.5 75 · Sustain

expert rating

enough healing and shield

More details in the list

T1.5 75 · Sustain

expert rating

enough shield

More details in the list

T1.5 75 · Sustain

expert rating

enough healing and shield

More details in the list

T1.5 75 · Sustain

expert rating

enough shield

More details in the list

T1.5 75 · Sustain

expert rating

enough shield

More details in the list

T1.5 75 · Sustain

expert rating

enough shield

More details in the list

T1.5 75 · Sustain

expert rating

enough healing

Limit 1.6M

More details in the list

T1.5 75 · Sustain

expert rating

enough shield

Limit 6.1M

More details in the list

T1.5 75 · Sustain

expert rating

enough healing

More details in the list

T1.5 75 · Sustain

expert rating

enough healing

More details in the list

T1.5 75 · Sustain

expert rating

enough healing

More details in the list

Ifa

T1.5 75 · Sustain

expert rating

enough healing

More details in the list

T1.5 75 · Sustain

expert rating

enough shield

More details in the list

T1.5 75 · Sustain

expert rating

enough healing

More details in the list

T2 55 · Sustain

expert rating

low shield

More details in the list

T2 55 · Sustain

expert rating

low shield

More details in the list

T2 55 · Sustain

expert rating

low healing

Limit 3.6M

More details in the list

T2 55 · Sustain

expert rating

low healing

More details in the list

Carry

5★ constellations and the best 5★ weapon from the guide (R1): team damage gain from our gcsim simulations
  1. 1
    100
    Limit 19.5M133.1K DPSSimulation: 100Tier lists: 98 (Prydwen T0 · WotPack S+)simulation
    Best team
  2. 2
    98
    Limit 3MTier lists: 98 (Prydwen T0 · WotPack S+)expert rating
  3. 2
    98
    Tier lists: 98 (Prydwen T0 · WotPack S+)expert rating
  4. 4
    97
    Tier lists: 96 (Prydwen T0 · WotPack S+ · Game8/PG 92 ↗↗)expert ratingНет в базе KQM; оценка по тир-листам: SS — 92, S — 82, A — 72, B — 60
    Best team team: Prydwen
  5. 4
    97
    Tier lists: 96 (Prydwen T0 · WotPack S+ · Game8/PG 92 ↗↗)expert ratingНет в базе KQM; оценка по тир-листам: SS — 92, S — 82, A — 72, B — 60
    Best team team: Prydwen
  6. 6
    95
    Tier lists: 94 (Prydwen T0 · WotPack S+ · Game8/PG 87 ↗↗)expert ratingНет в базе KQM; оценка по тир-листам: SS — 92, S — 82, A — 72, B — 60
    Best team team: Prydwen
  7. 7
    93
    Tier lists: 92 (Prydwen T0.5 · WotPack S+ · Game8/PG 87 ↗↗)expert ratingНет в базе KQM; оценка по тир-листам: SS — 92, S — 82, A — 72, B — 60
    Best team team: Prydwen
  8. 7
    NeferT0.5
    93
    Tier lists: 92 (Prydwen T0.5 · WotPack S+ · Game8/PG 87 ↗↗)expert ratingНет в базе KQM; оценка по тир-листам: SS — 92, S — 82, A — 72, B — 60
    Best team team: Prydwen
  9. 9
    SkirkT0.5
    89
    112.78K DPSSimulation: 85Tier lists: 94 (Prydwen T0.5 · WotPack S+)simulation
    Best team
  10. 10
    88
    Tier lists: 87 (Prydwen T1.5 · WotPack S+)expert rating
  11. 11
    86
    105.97K DPSSimulation: 80Tier lists: 94 (Prydwen T0.5 · WotPack S+)simulation
    Best team
  12. 12
    83
    Tier lists: 82 (Prydwen T1.5 · WotPack S)expert rating
  13. 13
    82
    Tier lists: 81 (Prydwen T1 · WotPack A · Game8/PG 82 ↗↗)expert ratingНет в базе KQM; оценка по тир-листам: SS — 92, S — 82, A — 72, B — 60
    Best team team: Prydwen
  14. 14
    81
    Limit 4.4M110.77K DPSSimulation: 83Tier lists: 77 (Prydwen T1.5 · WotPack A)simulation
    Best team
  15. 15
    79
    Limit 11.1M97.67K DPSSimulation: 73Tier lists: 86 (Prydwen T1 · WotPack S)simulation
    Best team
  16. 16
    76
    Limit 12.3M93.84K DPSSimulation: 71Tier lists: 81 (Prydwen T1 · WotPack A)simulation
    Best team
  17. 17
    73
    Limit 1.8MTier lists: 73 (Prydwen T2 · WotPack A)expert rating
  18. 17
    73
    Limit 2.2MTier lists: 73 (Prydwen T2 · WotPack A)expert rating
  19. 19
    KinichT1.5
    72
    Limit 3.9M80.74K DPSSimulation: 61Tier lists: 86 (Prydwen T1 · WotPack S)simulation
    Best team
  20. 20
    RazorT1.5
    71
    90.86K DPSSimulation: 68Tier lists: 73 (Prydwen T2 · WotPack A)simulation
    Best team
  21. 21
    VaresaT1.5
    70
    76.57K DPSSimulation: 58Tier lists: 86 (Prydwen T1 · WotPack S)simulation
    Best team
  22. 22
    67
    Limit 3.3M78.26K DPSSimulation: 59Tier lists: 77 (Prydwen T1.5 · WotPack A)simulation
    Best team
  23. 23
    66
    Limit 2.7M75.33K DPSSimulation: 57Tier lists: 77 (Prydwen T1.5 · WotPack A)simulation
    Best team
  24. 23
    66
    61.19K DPSSimulation: 46Tier lists: 94 (Prydwen T0.5 · WotPack S+)simulation
    Best team
  25. 25
    64
    Limit 791K72.03K DPSSimulation: 54Tier lists: 77 (Prydwen T1.5 · WotPack A)simulation
    Best team
  26. 26
    60
    Limit 8.2M86.44K DPSSimulation: 65Tier lists: 50 (Prydwen T4 · WotPack C)simulation
    Best team
  27. 26
    60
    86.2K DPSSimulation: 65Tier lists: 50 (Prydwen T4 · WotPack C)simulation
    Best team
  28. 28
    59
    Limit 531K70.69K DPSSimulation: 53Tier lists: 66 (Prydwen T2 · WotPack B)simulation
    Best team
  29. 29
    58
    Limit 3.3M60.22K DPSSimulation: 45Tier lists: 77 (Prydwen T1.5 · WotPack A)simulation
    Best team
  30. 30
    57
    Limit 3.6M71.93K DPSSimulation: 54Tier lists: 61 (Prydwen T3 · WotPack B)simulation
    Best team
  31. 30
    57
    Tier lists: 56 (Prydwen T4 · WotPack B)expert rating
  32. 32
    56
    Limit 1.2M64.6K DPSSimulation: 49Tier lists: 66 (Prydwen T2 · WotPack B)simulation
    Best team
  33. 32
    56
    Tier lists: 55 (Prydwen T3 · WotPack C)expert rating
  34. 34
    55
    Limit 1.8M52.75K DPSSimulation: 40Tier lists: 75 (WotPack A)comfortablehealingsimulation
    Best team
  35. 35
    54
    Limit 497K35.36K DPSSimulation: 27Tier lists: 94 (Prydwen T0.5 · WotPack S+)simulation
    Best team
  36. 36
    53
    47.75K DPSSimulation: 36Tier lists: 78 (Prydwen T2 · WotPack S)simulation
    Best team
  37. 37
    52
    38.84K DPSSimulation: 29Tier lists: 86 (Prydwen T1 · WotPack S)simulation
    Best team
  38. 37
    52
    Limit 720K30.67K DPSSimulation: 23Tier lists: 95 (WotPack S+)simulation
    Best team
  39. 39
    51
    Tier lists: 50 (Prydwen T4 · WotPack C)expert rating
  40. 39
    51
    Tier lists: 50 (Prydwen T4 · WotPack C)expert ratingenoughhealing
  41. 39
    51
    Tier lists: 50 (Prydwen T4 · WotPack C)expert rating
  42. 39
    51
    Limit 1.4MTier lists: 50 (Prydwen T4 · WotPack C)expert rating
  43. 39
    51
    Limit 1.5MTier lists: 50 (Prydwen T4 · WotPack C)expert rating
  44. 44
    49
    Limit 4.4M40.19K DPSSimulation: 30Tier lists: 77 (Prydwen T1.5 · WotPack A)simulation
    Best team
  45. 45
    46
    Limit 2.4M50.41K DPSSimulation: 38Tier lists: 56 (Prydwen T4 · WotPack B)simulation
    Best team
  46. 45
    46
    Limit 1M43K DPSSimulation: 32Tier lists: 66 (Prydwen T2 · WotPack B)simulation
    Best team
  47. 47
    45
    43.62K DPSSimulation: 33Tier lists: 61 (Prydwen T3 · WotPack B)simulation
    Best team
  48. 47
    45
    39.65K DPSSimulation: 30Tier lists: 68 (Prydwen T3 · WotPack A)simulation
    Best team
  49. 49
    42
    37.14K DPSSimulation: 28Tier lists: 61 (Prydwen T3 · WotPack B)simulation
    Best team
  50. 49
    42
    33.67K DPSSimulation: 25Tier lists: 66 (Prydwen T2 · WotPack B)enoughhealing and shieldsimulation
    Best team
  51. 49
    IfaT3
    42
    32.62K DPSSimulation: 25Tier lists: 66 (Prydwen T2 · WotPack B)enoughhealingsimulation
    Best team
  52. 52
    40
    Limit 2.5MTier lists: 40 (Prydwen T5 · WotPack D)expert rating
  53. 52
    40
    Tier lists: 40 (Prydwen T5 · WotPack D)expert rating
  54. 52
    40
    Tier lists: 40 (Prydwen T5 · WotPack D)expert ratinglowshield
  55. 55
    39
    36.99K DPSSimulation: 28Tier lists: 55 (Prydwen T3 · WotPack C)simulation
    Best team
  56. 55
    39
    Limit 1.6M31.71K DPSSimulation: 24Tier lists: 61 (Prydwen T3 · WotPack B)simulation
    Best team
  57. 57
    37
    32.51K DPSSimulation: 24Tier lists: 56 (Prydwen T4 · WotPack B)simulation
    Best team
  58. 58
    36
    29.85K DPSSimulation: 22Tier lists: 56 (Prydwen T4 · WotPack B)simulation
    Best team
  59. 59
    28
    26.47K DPSSimulation: 20Tier lists: 40 (Prydwen T5 · WotPack D)simulation
    Best team

Sub-DPS

5★ constellations and the best 5★ weapon from the guide (R1): team damage gain from our gcsim simulations
  1. 1
    100
    64.63K DPSSimulation: 100Tier lists: 94 (Prydwen T0.5 · WotPack S+)simulation
    Best team
  2. 2
    98
    Tier lists: 96 (Prydwen T0 · WotPack S+ · Game8/PG 92 ↗↗)expert ratingНет в базе KQM; оценка по тир-листам: SS — 92, S — 82, A — 72, B — 60
    Best team team: Prydwen
  3. 3
    97
    Tier lists: 95 (Prydwen T0 · WotPack S+ · Game8/PG 90 ↗↗)expert ratingНет в базе KQM; оценка по тир-листам: SS — 92, S — 82, A — 72, B — 60
    Best team team: Prydwen
  4. 4
  5. 5
    93
    Limit 19.5MTier lists: 91 (Prydwen T1 · WotPack S+)expert rating
  6. 6
    IneffaT0.5
    91
    55.15K DPSSimulation: 85Tier lists: 94 (Prydwen T0.5 · WotPack S+)simulation
    Best team
  7. 7
    AlbedoT0.5
    88
    Tier lists: 86 (Prydwen T1 · WotPack S)expert rating
  8. 8
    84
    Tier lists: 82 (Prydwen T1.5 · WotPack S)expert rating
  9. 9
    83
    Limit 2.2M55.59K DPSSimulation: 86Tier lists: 73 (Prydwen T2 · WotPack A)simulation
    Best team
  10. 10
    80
    Limit 2.6M51.1K DPSSimulation: 79Tier lists: 77 (Prydwen T1.5 · WotPack A)simulation
    Best team
  11. 11
    77
    39.47K DPSSimulation: 61Tier lists: 98 (Prydwen T0 · WotPack S+)simulation
    Best team
  12. 12
    FischlT1.5
    76
    41.11K DPSSimulation: 64Tier lists: 89 (Prydwen T0.5 · WotPack S)simulation
    Best team
  13. 13
    74
    Tier lists: 73 (Prydwen T2 · WotPack A)expert rating
  14. 14
    67
    Limit 3M28.77K DPSSimulation: 45Tier lists: 95 (WotPack S+)simulation
    Best team
  15. 15
    66
    32.64K DPSSimulation: 51Tier lists: 85 (WotPack S)simulation
    Best team
  16. 16
    65
    36.94K DPSSimulation: 57Tier lists: 73 (Prydwen T2 · WotPack A)enoughhealingsimulation
    Best team
  17. 17
    63
    33.43K DPSSimulation: 52Tier lists: 75 (WotPack A)simulation
    Best team
  18. 17
    63
    Tier lists: 61 (Prydwen T3 · WotPack B)expert ratingenoughshield
  19. 19
    61
    Limit 4.5M26.9K DPSSimulation: 42Tier lists: 86 (Prydwen T1 · WotPack S)enoughhealingsimulation
    Best team
  20. 20
    60
    Limit 3.5M27.52K DPSSimulation: 43Tier lists: 82 (Prydwen T1.5 · WotPack S)simulation
    Best team
  21. 21
    59
    Limit 1.1M27.74K DPSSimulation: 43Tier lists: 81 (Prydwen T1 · WotPack A)simulation
    Best team
  22. 21
    59
    25.51K DPSSimulation: 39Tier lists: 85 (WotPack S)simulation
    Best team
  23. 21
    59
    21.46K DPSSimulation: 33Tier lists: 94 (Prydwen T0.5 · WotPack S+)enoughhealingsimulation
    Best team
  24. 24
    57
    Limit 720K18.15K DPSSimulation: 28Tier lists: 98 (Prydwen T0 · WotPack S+)simulation
    Best team
  25. 25
  26. 25
    56
    Tier lists: 55 (WotPack C · Game8/PG 60 ↗↗)expert ratingНет в базе KQM; оценка по тир-листам: SS — 92, S — 82, A — 72, B — 60
  27. 25
    56
    Tier lists: 55 (Prydwen T3 · WotPack C)expert ratingcomfortablehealing
  28. 25
    56
    Tier lists: 55 (Prydwen T3 · WotPack C)expert rating
  29. 29
    54
    23.27K DPSSimulation: 36Tier lists: 77 (Prydwen T1.5 · WotPack A)simulation
    Best team
  30. 30
    53
    23.96K DPSSimulation: 37Tier lists: 75 (WotPack A)simulation
    Best team
  31. 31
    52
    22.7K DPSSimulation: 35Tier lists: 75 (WotPack A)simulation
    Best team
  32. 31
    52
    Limit 1.5M22.23K DPSSimulation: 34Tier lists: 75 (WotPack A)comfortableshieldsimulation
    Best team
  33. 33
    50
    18.4K DPSSimulation: 28Tier lists: 81 (Prydwen T1 · WotPack A)simulation
    Best team
  34. 34
    49
    Limit 1.8M20.79K DPSSimulation: 32Tier lists: 73 (Prydwen T2 · WotPack A)comfortablehealingsimulation
    Best team
  35. 34
    49
    10.67K DPSSimulation: 17Tier lists: 95 (WotPack S+)simulation
    Best team
  36. 36
    45
    Limit 1.8M15.54K DPSSimulation: 24Tier lists: 75 (WotPack A)simulation
    Best team
  37. 36
    45
    14.72K DPSSimulation: 23Tier lists: 75 (WotPack A)enoughshieldsimulation
    Best team
  38. 38
    44
    24.56K DPSSimulation: 38Tier lists: 50 (WotPack C)enoughhealingsimulation
    Best team
  39. 39
    IfaT3
    43
    18.91K DPSSimulation: 29Tier lists: 62 (WotPack B)enoughhealingsimulation
    Best team
  40. 40
    42
    22.48K DPSSimulation: 35Tier lists: 50 (WotPack C)simulation
    Best team
  41. 41
    41
    21.46K DPSSimulation: 33Tier lists: 50 (WotPack C)simulation
    Best team
  42. 42
    40
    15.45K DPSSimulation: 24Tier lists: 62 (WotPack B)simulation
    Best team
  43. 43
    39
    19.45K DPSSimulation: 30Tier lists: 50 (WotPack C)simulation
    Best team
  44. 44
    38
    Limit 2.4M13.31K DPSSimulation: 21Tier lists: 62 (WotPack B)simulation
    Best team
  45. 45
    36
    11.84K DPSSimulation: 18Tier lists: 62 (WotPack B)lowshieldsimulation
    Best team
  46. 46
    33
    17.39K DPSSimulation: 27Tier lists: 40 (WotPack D)simulation
    Best team
  47. 46
    33
    13.36K DPSSimulation: 21Tier lists: 50 (WotPack C)simulation
    Best team
  48. 48
    26
    10.57K DPSSimulation: 16Tier lists: 40 (WotPack D)simulation
    Best team

Support

5★ constellations and the best 5★ weapon from the guide (R1): team damage gain from our gcsim simulations
  1. 1
    100
    +30% to team damage across 188 swapsSimulation: 100Tier lists: 98 (Prydwen T0 · WotPack S+)simulation
    Best team
  2. 2
    96
    +24% to team damage across 180 swapsSimulation: 95Tier lists: 94 (Prydwen T0.5 · WotPack S+)simulation
    Best team
  3. 2
    96
    Tier lists: 95 (Prydwen T0 · WotPack S+ · Game8/PG 90 ↗↗)expert ratingНет в базе KQM; оценка по тир-листам: SS — 92, S — 82, A — 72, B — 60
    Best team team: Prydwen
  4. 4
    94
    +20% to team damage across 850 swapsSimulation: 92Tier lists: 95 (WotPack S+)enoughhealingsimulation
    Best team
  5. 4
    OdetteT0.5
    94
    Tier lists: 94 (WotPack S+ · Game8/PG 92 ↗↗)expert ratingНет в базе KQM; оценка по тир-листам: SS — 92, S — 82, A — 72, B — 60
    Best team team: Prydwen
  6. 6
    LinneaT0.5
    93
    Tier lists: 93 (WotPack S+ · Game8/PG 90 ↗↗)expert ratingНет в базе KQM; оценка по тир-листам: SS — 92, S — 82, A — 72, B — 60
    Best team team: Prydwen
  7. 7
    91
    Limit 3.6M+14% to team damage across 443 swapsSimulation: 88Tier lists: 94 (Prydwen T0.5 · WotPack S+)lowhealingsimulation
    Best team
  8. 7
    91
    +10% to team damage across 600 swapsSimulation: 85Tier lists: 98 (Prydwen T0 · WotPack S+)simulation
    Best team
  9. 7
    91
    Tier lists: 90 (Prydwen T0 · WotPack S · Game8/PG 85 ↗↗)expert ratingenoughhealingНет в базе KQM; оценка по тир-листам: SS — 92, S — 82, A — 72, B — 60
    Best team team: Prydwen
  10. 10
    PruneT0.5
    90
    +22% to team damage across 53 swapsSimulation: 94Tier lists: 82 (Prydwen T1.5 · WotPack S)simulation
    Best team
  11. 10
    90
    Limit 6.1M+11% to team damage across 738 swapsSimulation: 86Tier lists: 94 (Prydwen T0.5 · WotPack S+)enoughshieldsimulation
    Best team
  12. 12
    88
    Limit 1.6M+14% to team damage across 1,095 swapsSimulation: 88Tier lists: 86 (Prydwen T1 · WotPack S)enoughhealingsimulation
    Best team
  13. 12
    88
    Limit 2.1M+7% to team damage across 1,276 swapsSimulation: 83Tier lists: 94 (Prydwen T0.5 · WotPack S+)comfortablehealingsimulation
    Best team
  14. 14
    87
    Limit 3.5M+13% to team damage across 1,424 swapsSimulation: 87Tier lists: 85 (WotPack S)simulation
    Best team
  15. 15
    86
    +6% to team damage across 199 swapsSimulation: 82Tier lists: 89 (Prydwen T0.5 · WotPack S)simulation
    Best team
  16. 15
    86
    Limit 3M+3% to team damage across 314 swapsSimulation: 79Tier lists: 95 (WotPack S+)simulation
    Best team
  17. 17
    84
    +6% to team damage across 237 swapsSimulation: 82Tier lists: 85 (WotPack S)simulation
    Best team
  18. 18
    83
    Limit 1.8M+13% to team damage across 298 swapsSimulation: 87Tier lists: 75 (WotPack A)simulation
    Best team
  19. 18
    83
    Limit 497K−5% to team damage across 220 swapsSimulation: 73Tier lists: 95 (WotPack S+)simulation
    Best team
  20. 20
    82
    Limit 729K+8% to team damage across 854 swapsSimulation: 84Tier lists: 77 (Prydwen T1.5 · WotPack A)simulation
    Best team
  21. 20
    82
    Tier lists: 81 (Prydwen T1.5 · WotPack S · Game8/PG 80 ↗↗)expert ratingНет в базе KQM; оценка по тир-листам: SS — 92, S — 82, A — 72, B — 60
    Best team team: Prydwen
  22. 22
    81
    Limit 2.6M+9% to team damage across 1,020 swapsSimulation: 84Tier lists: 75 (WotPack A)simulation
    Best team
  23. 22
    81
    Limit 4.2M−4% to team damage across 476 swapsSimulation: 74Tier lists: 89 (Prydwen T0.5 · WotPack S)simulation
    Best team
  24. 22
    81
    −8% to team damage across 39 swapsSimulation: 71Tier lists: 95 (WotPack S+)simulation
    Best team
  25. 25
    80
    Limit 1.7M+8% to team damage across 805 swapsSimulation: 83Tier lists: 73 (Prydwen T2 · WotPack A)enoughhealingsimulation
    Best team
  26. 25
    80
    +7% to team damage across 593 swapsSimulation: 82Tier lists: 75 (WotPack A)simulation
    Best team
  27. 25
    80
    Limit 953K+6% to team damage across 879 swapsSimulation: 82Tier lists: 75 (WotPack A)simulation
    Best team
  28. 25
    80
    +4% to team damage across 576 swapsSimulation: 80Tier lists: 77 (Prydwen T1.5 · WotPack A)simulation
    Best team
  29. 25
    80
    Limit 1.1M+4% to team damage across 1,256 swapsSimulation: 80Tier lists: 77 (Prydwen T1.5 · WotPack A)simulation
    Best team
  30. 30
    AlbedoT1.5
    79
    −4% to team damage across 318 swapsSimulation: 74Tier lists: 85 (WotPack S)simulation
    Best team
  31. 30
    IllugaT1.5
    79
    Tier lists: 79 (Prydwen T1.5 · WotPack S · Game8/PG 72 ↗↗)expert ratingНет в базе KQM; оценка по тир-листам: SS — 92, S — 82, A — 72, B — 60
    Best team team: Prydwen
  32. 32
    JahodaT1.5
    78
    +6% to team damage across 10 swapsSimulation: 82Tier lists: 71 (Prydwen T1.5 · WotPack B)enoughhealingsimulation
    Best team
  33. 32
    78
    +5% to team damage across 320 swapsSimulation: 81Tier lists: 71 (Prydwen T1.5 · WotPack B)simulation
    Best team
  34. 32
    78
    +1% to team damage across 895 swapsSimulation: 78Tier lists: 75 (WotPack A)simulation
    Best team
  35. 32
    AinoT1.5
    78
    +1% to team damage across 27 swapsSimulation: 78Tier lists: 77 (Prydwen T1.5 · WotPack A)simulation
    Best team
  36. 32
    VentiT1.5
    78
    −6% to team damage across 114 swapsSimulation: 72Tier lists: 85 (WotPack S)simulation
    Best team
  37. 32
    NilouT1.5
    78
    Tier lists: 77 (Prydwen T1.5 · WotPack A)expert rating
  38. 38
    77
    Limit 1.5M−2% to team damage across 1,015 swapsSimulation: 76Tier lists: 77 (Prydwen T1.5 · WotPack A)comfortableshieldsimulation
    Best team
  39. 39
    DionaT1.5
    76
    −7% to team damage across 364 swapsSimulation: 72Tier lists: 81 (Prydwen T1 · WotPack A)enoughhealing and shieldsimulation
    Best team
  40. 40
    75
    −3% to team damage across 425 swapsSimulation: 75Tier lists: 73 (Prydwen T2 · WotPack A)enoughshieldsimulation
    Best team
  41. 40
    BeidouT1.5
    75
    −4% to team damage across 219 swapsSimulation: 74Tier lists: 74 (Prydwen T1 · WotPack B)lowshieldsimulation
    Best team
  42. 40
    QiqiT1.5
    75
    Limit 1.7M−14% to team damage across 109 swapsSimulation: 67Tier lists: 86 (Prydwen T1 · WotPack S)comfortablehealingsimulation
    Best team
  43. 43
    74
    +1% to team damage across 534 swapsSimulation: 78Tier lists: 66 (Prydwen T2 · WotPack B)simulation
    Best team
  44. 43
    GorouT1.5
    74
    −3% to team damage across 95 swapsSimulation: 75Tier lists: 71 (Prydwen T1.5 · WotPack B)simulation
    Best team
  45. 43
    JeanT1.5
    74
    −4% to team damage across 407 swapsSimulation: 74Tier lists: 73 (Prydwen T2 · WotPack A)comfortablehealingsimulation
    Best team
  46. 43
    74
    −6% to team damage across 423 swapsSimulation: 73Tier lists: 73 (Prydwen T2 · WotPack A)comfortablehealingsimulation
    Best team
  47. 47
    73
    +0% to team damage across 269 swapsSimulation: 77Tier lists: 66 (Prydwen T2 · WotPack B)simulation
    Best team
  48. 47
    BaizhuT1.5
    73
    −1% to team damage across 524 swapsSimulation: 76Tier lists: 68 (Prydwen T3 · WotPack A)comfortablehealing and shieldsimulation
    Best team
  49. 47
    73
    Tier lists: 73 (Prydwen T2 · WotPack A)expert ratingenoughhealing
  50. 50
    72
    +1% to team damage across 218 swapsSimulation: 78Tier lists: 62 (WotPack B)simulation
    Best team
  51. 50
    KiraraT1.5
    72
    +1% to team damage across 403 swapsSimulation: 78Tier lists: 61 (Prydwen T3 · WotPack B)enoughshieldsimulation
    Best team
  52. 50
    ColleiT1.5
    72
    −5% to team damage across 182 swapsSimulation: 73Tier lists: 68 (Prydwen T3 · WotPack A)simulation
    Best team
  53. 50
    LaylaT1.5
    72
    −6% to team damage across 558 swapsSimulation: 73Tier lists: 68 (Prydwen T3 · WotPack A)enoughshieldsimulation
    Best team
  54. 54
    71
    +0% to team damage across 234 swapsSimulation: 77Tier lists: 61 (Prydwen T3 · WotPack B)comfortablehealingsimulation
    Best team
  55. 54
    71
    −2% to team damage across 166 swapsSimulation: 76Tier lists: 61 (Prydwen T3 · WotPack B)simulation
    Best team
  56. 54
    71
    Limit 2.4M−3% to team damage across 337 swapsSimulation: 75Tier lists: 62 (WotPack B)simulation
    Best team
  57. 57
    70
    −5% to team damage across 186 swapsSimulation: 74Tier lists: 63 (Prydwen T4 · WotPack A)simulation
    Best team
  58. 57
    YaoyaoT1.5
    70
    −7% to team damage across 248 swapsSimulation: 71Tier lists: 68 (Prydwen T3 · WotPack A)comfortablehealingsimulation
    Best team
  59. 59
    69
    −5% to team damage across 185 swapsSimulation: 73Tier lists: 62 (WotPack B)simulation
    Best team
  60. 60
    68
    +3% to team damage across 271 swapsSimulation: 79Tier lists: 50 (WotPack C)simulation
    Best team
  61. 60
    68
    −1% to team damage across 175 swapsSimulation: 76Tier lists: 55 (Prydwen T3 · WotPack C)enoughshieldsimulation
    Best team
  62. 60
    68
    Limit 1.8MTier lists: 68 (Prydwen T3 · WotPack A)expert ratingcomfortablehealing
  63. 63
    67
    Limit 1.4M+1% to team damage across 582 swapsSimulation: 78Tier lists: 50 (Prydwen T4 · WotPack C)simulation
    Best team
  64. 63
    67
    +0% to team damage across 259 swapsSimulation: 77Tier lists: 50 (WotPack C)enoughhealingsimulation
    Best team
  65. 63
    67
    −4% to team damage across 417 swapsSimulation: 74Tier lists: 55 (Prydwen T3 · WotPack C)simulation
    Best team
  66. 63
    67
    −5% to team damage across 316 swapsSimulation: 74Tier lists: 56 (Prydwen T4 · WotPack B)enoughshieldsimulation
    Best team
  67. 63
    67
    −5% to team damage across 194 swapsSimulation: 73Tier lists: 56 (Prydwen T4 · WotPack B)lowhealingsimulation
    Best team
  68. 63
    67
    Limit 1M−10% to team damage across 85 swapsSimulation: 70Tier lists: 62 (WotPack B)simulation
    Best team
  69. 69
    66
    Limit 8.2M−2% to team damage across 236 swapsSimulation: 76Tier lists: 50 (WotPack C)simulation
    Best team
  70. 69
    66
    Limit 1.5M−2% to team damage across 155 swapsSimulation: 76Tier lists: 50 (WotPack C)simulation
    Best team
  71. 69
    66
    −6% to team damage across 467 swapsSimulation: 73Tier lists: 55 (Prydwen T3 · WotPack C)simulation
    Best team
  72. 69
    66
    −8% to team damage across 319 swapsSimulation: 71Tier lists: 56 (Prydwen T4 · WotPack B)enoughhealingsimulation
    Best team
  73. 73
    65
    +0% to team damage across 90 swapsSimulation: 77Tier lists: 45 (Prydwen T4 · WotPack D)simulation
    Best team
  74. 73
    65
    −10% to team damage across 351 swapsSimulation: 70Tier lists: 55 (Prydwen T3 · WotPack C)simulation
    Best team
  75. 75
    64
    −5% to team damage across 132 swapsSimulation: 73Tier lists: 50 (Prydwen T3 · WotPack D)simulation
    Best team
  76. 76
    63
    −4% to team damage across 60 swapsSimulation: 74Tier lists: 45 (Prydwen T5 · WotPack C)simulation
    Best team
  77. 76
    63
    −8% to team damage across 82 swapsSimulation: 71Tier lists: 50 (WotPack C)simulation
    Best team
  78. 78
    61
    −14% to team damage across 130 swapsSimulation: 67Tier lists: 50 (Prydwen T4 · WotPack C)comfortablehealingsimulation
    Best team
  79. 78
    61
    Tier lists: 60 (Prydwen T2 · WotPack C)expert rating
  80. 80
    59
    −9% to team damage across 64 swapsSimulation: 70Tier lists: 40 (WotPack D)simulation
    Best team
  81. 81
    58
    −16% to team damage across 80 swapsSimulation: 65Tier lists: 45 (Prydwen T4 · WotPack D)simulation
    Best team
  82. 82
    57
    Limit 2.5M−12% to team damage across 54 swapsSimulation: 68Tier lists: 40 (WotPack D)simulation
    Best team
  83. 82
    57
    −13% to team damage across 233 swapsSimulation: 67Tier lists: 40 (WotPack D)lowshieldsimulation
    Best team

Sustain

  1. 1
    90
    Limit 2.1Mexpert ratingcomfortablehealing
  2. 1
    90
    Limit 1.8Mexpert ratingcomfortablehealing
  3. 1
    BaizhuT0.5
    90
    expert ratingcomfortablehealing and shield
  4. 1
    90
    expert ratingcomfortablehealing
  5. 1
    90
    expert ratingcomfortablehealing
  6. 1
    YaoyaoT0.5
    90
    expert ratingcomfortablehealing
  7. 1
    JeanT0.5
    90
    expert ratingcomfortablehealing
  8. 1
    90
    expert ratingcomfortablehealing
  9. 1
    QiqiT0.5
    90
    Limit 1.7Mexpert ratingcomfortablehealing
  10. 1
    90
    Limit 1.5Mexpert ratingcomfortableshield
  11. 11
    FurinaT1.5
    75
    Limit 4.5Mexpert ratingenoughhealing
  12. 11
    75
    Limit 1.7Mexpert ratingenoughhealing
  13. 11
    75
    expert ratingenoughhealing
  14. 11
    DionaT1.5
    75
    expert ratingenoughhealing and shield
  15. 11
    LaylaT1.5
    75
    expert ratingenoughshield
  16. 11
    NoelleT1.5
    75
    expert ratingenoughhealing and shield
  17. 11
    ThomaT1.5
    75
    expert ratingenoughshield
  18. 11
    KiraraT1.5
    75
    expert ratingenoughshield
  19. 11
    75
    expert ratingenoughshield
  20. 11
    75
    Limit 1.6Mexpert ratingenoughhealing
  21. 11
    75
    Limit 6.1Mexpert ratingenoughshield
  22. 11
    75
    expert ratingenoughhealing
  23. 11
    DoriT1.5
    75
    expert ratingenoughhealing
  24. 11
    MikaT1.5
    75
    expert ratingenoughhealing
  25. 11
    IfaT1.5
    75
    expert ratingenoughhealing
  26. 11
    DahliaT1.5
    75
    expert ratingenoughshield
  27. 11
  28. 11
    JahodaT1.5
    75
    expert ratingenoughhealing
  29. 29
    55
    expert ratinglowshield
  30. 29
    55
    expert ratinglowshield
  31. 29
    55
    Limit 3.6Mexpert ratinglowhealing
  32. 29
    55
    expert ratinglowhealing

Abyss

Version 7.1 — Floors 9–12 · Current cycle →

1st half: Stellar Glimmer

  1. 1
    Melt
    100T0
    Team DPS 135.55Ksimulation
  2. 2
    Melt
    98T0
    Team DPS 132.21Ksimulation
  3. 3
    Melt
    96T0
    Team DPS 130.13Ksimulation
  4. 4
    Melt
    95T0
    Team DPS 129.16Ksimulation
  5. 5
    Melt
    83T1
    Team DPS 112.16Ksimulation
  6. 6
    Melt
    78T1.5
    Team DPS 106.28Ksimulation
  7. 7
    Melt
    77T1.5
    Team DPS 104.71Ksimulation
  8. 7
    Melt
    77T1.5
    Team DPS 103.77Ksimulation
  9. 9
    Melt
    76T1.5
    Team DPS 103.6Ksimulation
  10. 9
    Melt
    76T1.5
    Team DPS 103.21Ksimulation

2nd half: Cryo

  1. 1
    Melt
    100T0
    Team DPS 159.22Ksimulation
  2. 2
    Freeze
    92T0.5
    Team DPS 146.75Ksimulation
  3. 3
    Freeze
    91T0.5
    Team DPS 144.88Ksimulation
  4. 4
    Freeze
    88T0.5
    Team DPS 140.11Ksimulation
  5. 5
    Freeze
    87T1
    Team DPS 138.09Ksimulation
  6. 6
    Melt
    86T1
    Team DPS 136.64Ksimulation
  7. 7
    Melt
    85T1
    Team DPS 135.55Ksimulation
  8. 8
    Melt
    83T1
    Team DPS 132.21Ksimulation
  9. 9
    Freeze
    82T1
    Team DPS 130.73Ksimulation
  10. 9
    Freeze
    82T1
    Team DPS 130.36Ksimulation

Theater

Season 28 — elements: Hydro, Cryo, Anemo · Current cycle →

  1. 1
    Freeze
    100T0
    Team DPS 146.75Ksimulation
  2. 2
    Freeze
    99T0
    Team DPS 144.88Ksimulation
  3. 3
    Freeze
    95T0
    Team DPS 140.11Ksimulation
  4. 4
    Freeze
    94T0.5
    Team DPS 138.09Ksimulation
  5. 5
    Freeze
    89T0.5
    Team DPS 130.73Ksimulation
  6. 5
    Freeze
    89T0.5
    Team DPS 130.36Ksimulation
  7. 7
    Freeze
    86T1
    Team DPS 126.24Ksimulation
  8. 8
    Freeze
    85T1
    Team DPS 124.85Ksimulation
  9. 8
    Freeze
    85T1
    Team DPS 124.8Ksimulation
  10. 8
    Freeze
    85T1
    Team DPS 124.29Ksimulation
  11. 11
    Lunar-Charged
    82T1
    Team DPS 121.05Ksimulation
  12. 11
    Lunar-Charged
    82T1
    Team DPS 120.02Ksimulation
  13. 13
    Freeze
    81T1
    Team DPS 119.49Ksimulation
  14. 13
    Freeze
    81T1
    Team DPS 119.02Ksimulation
  15. 13
    Freeze
    81T1
    Team DPS 118.82Ksimulation

Bosses

Bosses are grouped by their main mechanic. Each shows the best suitable teams from the simulation database.

Weekly bosses

Lunar reactions

Lunar reactions break shields and mechanics more effectively.

  1. The Doctor
    Lunar reactions
    100T0Team DPS 149.03Ksimulation
    Best teams
    1. 2
      96T0Team DPS 143.12Ksimulation
    2. 3
      95T0Team DPS 141.31Ksimulation

Pneuma and Ousia

Pneuma or Ousia attacks break the key mechanic.

  1. All-Devouring Narwhal
    Pneuma and Ousia
    100T0Team DPS 159.22Ksimulation
    Best teams
    1. 2
      92T0.5Team DPS 146.75Ksimulation
    2. 3
      91T0.5Team DPS 144.88Ksimulation

Element required

A specific element breaks the shield or core.

  1. La Signora
    Element required
    Required: Pyro
    100T0Team DPS 159.22Ksimulation
    Best teams
    1. 2
      88T0.5Team DPS 140.46Ksimulation
    2. 3
      86T1Team DPS 136.64Ksimulation

Elemental immunity

The boss is immune to its own element, so a carry of that element is unsuitable.

  1. Lupus Boreas, Dominator of Wolves
    Elemental immunity
    Immune: Cryo, Anemo
    100T0Team DPS 159.22Ksimulation
    Best teams
    1. 2
      94T0.5Team DPS 149.03Ksimulation
    2. 3
      90T0.5Team DPS 143.12Ksimulation

Multiple targets

Summons helpers or breakable objects, making area damage valuable.

  1. The Game Before the Gate
    Multiple targets
    100T0Team DPS 109.94Ksimulation
    Best teams
    1. 1
      100T0Team DPS 109.39Ksimulation
    2. 3
      97T0Team DPS 106.36Ksimulation

Airborne and mobile

Spends part of the fight airborne or at a distance; ranged damage is needed.

  1. Stormterror
    Airborne and mobile
    100T0Team DPS 141.31Ksimulation
    Best teams
    1. 2
      97T0Team DPS 137.56Ksimulation
    2. 2
      97T0Team DPS 136.54Ksimulation
  2. Magatsu Mitake Narukami no Mikoto
    Airborne and mobile
    100T0Team DPS 141.31Ksimulation
    Best teams
    1. 2
      97T0Team DPS 137.56Ksimulation
    2. 2
      97T0Team DPS 136.54Ksimulation
  3. Shouki no Kami, the Prodigal
    Airborne and mobile
    100T0Team DPS 141.31Ksimulation
    Best teams
    1. 2
      97T0Team DPS 137.56Ksimulation
    2. 2
      97T0Team DPS 136.54Ksimulation

Healing required

Deals constant party damage or traps a character in a cocoon that only healing can remove.

  1. The Knave
    Healing required
    100T0Team DPS 159.22Ksimulation
    Best teams
    1. 2
      92T0.5Team DPS 146.75Ksimulation
    2. 3
      91T0.5Team DPS 144.88Ksimulation

Adaptive resistance

Adapts resistance to the most frequently used damage element.

  1. Azhdaha
    Adaptive resistance
    100T0Team DPS 159.22Ksimulation
    Best teams
    1. 2
      94T0.5Team DPS 149.03Ksimulation
    2. 3
      92T0.5Team DPS 146.75Ksimulation

Single target

No special requirements: single-target damage decides the fight.

  1. Childe
    Single target
    100T0Team DPS 159.22Ksimulation
    Best teams
    1. 2
      94T0.5Team DPS 149.03Ksimulation
    2. 3
      92T0.5Team DPS 146.75Ksimulation
  2. Guardian of Apep's Oasis
    Single target
    100T0Team DPS 159.22Ksimulation
    Best teams
    1. 2
      94T0.5Team DPS 149.03Ksimulation
    2. 3
      92T0.5Team DPS 146.75Ksimulation
  3. Lord of Eroded Primal Fire
    Single target
    100T0Team DPS 159.22Ksimulation
    Best teams
    1. 2
      94T0.5Team DPS 149.03Ksimulation
    2. 3
      92T0.5Team DPS 146.75Ksimulation
  4. Il Dottore
    Single target
    100T0Team DPS 159.22Ksimulation
    Best teams
    1. 2
      94T0.5Team DPS 149.03Ksimulation
    2. 3
      92T0.5Team DPS 146.75Ksimulation

Normal bosses

Nightsoul

Attacks during Nightsoul's Blessing expose the weak point.

  1. Tenebrous Papilla: Type I
    NightsoulHealing required
    100T0Team DPS 159.22Ksimulation
    Best teams
    1. 2
      92T0.5Team DPS 146.75Ksimulation
    2. 3
      91T0.5Team DPS 144.88Ksimulation

Lunar reactions

Lunar reactions break shields and mechanics more effectively.

  1. Frostnight Herra
    Lunar reactions
    100T0Team DPS 149.03Ksimulation
    Best teams
    1. 2
      96T0Team DPS 143.12Ksimulation
    2. 3
      95T0Team DPS 141.31Ksimulation
  2. Lord of the Hidden Depths: Whisperer of Nightmares
    Lunar reactionsMultiple targets
    100T0Team DPS 109.94Ksimulation
    Best teams
    1. 1
      100T0Team DPS 109.39Ksimulation
    2. 3
      97T0Team DPS 106.36Ksimulation

Stellar reactions

Stellar Glimmer and other stellar reactions stop these mechanics.
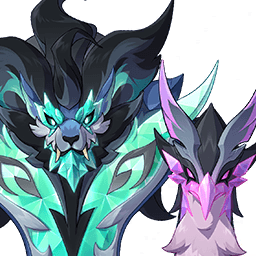
  1. Chimeric Winged Lion
    Stellar reactions
    100T0Team DPS 149.03Ksimulation
    Best teams
    1. 2
      98T0Team DPS 146.75Ksimulation
    2. 3
      97T0Team DPS 144.88Ksimulation
  2. Immortal Construct
    Stellar reactions
    100T0Team DPS 149.03Ksimulation
    Best teams
    1. 2
      98T0Team DPS 146.75Ksimulation
    2. 3
      97T0Team DPS 144.88Ksimulation

Pneuma and Ousia

Pneuma or Ousia attacks break the key mechanic.

  1. Icewind Suite
    Pneuma and Ousia
    100T0Team DPS 159.22Ksimulation
    Best teams
    1. 2
      92T0.5Team DPS 146.75Ksimulation
    2. 3
      91T0.5Team DPS 144.88Ksimulation
  2. Experimental Field Generator
    Pneuma and Ousia
    100T0Team DPS 159.22Ksimulation
    Best teams
    1. 2
      92T0.5Team DPS 146.75Ksimulation
    2. 3
      91T0.5Team DPS 144.88Ksimulation

Element required

A specific element breaks the shield or core.

  1. Pyro Hypostasis
    Element requiredElemental immunity
    Required: Hydro / CryoImmune: Pyro
    100T0Team DPS 149.03Ksimulation
    Best teams
    1. 2
      98T0Team DPS 146.75Ksimulation
    2. 3
      97T0Team DPS 144.88Ksimulation
  2. Dendro Hypostasis
    Element required
    Required: Dendro
    100T0Team DPS 141.31Ksimulation
    Best teams
    1. 2
      97T0Team DPS 137.56Ksimulation
    2. 2
      97T0Team DPS 136.54Ksimulation
  3. Cryo Regisvine
    Element required
    Required: Pyro
    100T0Team DPS 159.22Ksimulation
    Best teams
    1. 2
      88T0.5Team DPS 140.46Ksimulation
    2. 3
      86T1Team DPS 136.64Ksimulation
  4. Pyro Regisvine
    Element required
    Required: Hydro / Cryo
    100T0Team DPS 159.22Ksimulation
    Best teams
    1. 2
      94T0.5Team DPS 149.03Ksimulation
    2. 3
      92T0.5Team DPS 146.75Ksimulation
  5. Golden Wolflord
    Element requiredHealing required
    Required: Geo
    100T0Team DPS 136.64Ksimulation
    Best teams
    1. 2
      89T0.5Team DPS 122.23Ksimulation
    2. 2
      89T0.5Team DPS 121.43Ksimulation
  6. Algorithm of Semi-Intransient Matrix of Overseer Network
    Element required
    Required: Electro
    100T0Team DPS 149.03Ksimulation
    Best teams
    1. 2
      96T0Team DPS 143.12Ksimulation
    2. 3
      95T0Team DPS 141.31Ksimulation
  7. Jadeplume Terrorshroom
    Element required
    Required: Pyro
    100T0Team DPS 159.22Ksimulation
    Best teams
    1. 2
      88T0.5Team DPS 140.46Ksimulation
    2. 3
      86T1Team DPS 136.64Ksimulation
  8. Emperor of Fire and Iron
    Element required
    Required: Hydro / Cryo / Electro
    100T0Team DPS 159.22Ksimulation
    Best teams
    1. 2
      94T0.5Team DPS 149.03Ksimulation
    2. 3
      92T0.5Team DPS 146.75Ksimulation
  9. Millennial Pearl Seahorse
    Element required
    Required: Hydro / Pyro / Cryo / Dendro
    100T0Team DPS 159.22Ksimulation
    Best teams
    1. 2
      94T0.5Team DPS 149.03Ksimulation
    2. 3
      92T0.5Team DPS 146.75Ksimulation
  10. Legatus Golem
    Element requiredMultiple targets
    Required: Geo
    100T0Team DPS 78.2Ksimulation
    Best teams
    1. 2
      72T1.5Team DPS 56.5Ksimulation
    2. 3
      70T1.5Team DPS 54.84Ksimulation
  11. Wayward Hermetic Spiritspeaker
    Element required
    Required: Pyro / Geo
    100T0Team DPS 159.22Ksimulation
    Best teams
    1. 2
      88T0.5Team DPS 140.46Ksimulation
    2. 3
      86T1Team DPS 136.64Ksimulation
  12. Gluttonous Yumkasaur Mountain King
    Element required
    Required: Pyro
    100T0Team DPS 159.22Ksimulation
    Best teams
    1. 2
      88T0.5Team DPS 140.46Ksimulation
    2. 3
      86T1Team DPS 136.64Ksimulation
  13. Secret Source Automaton: Overseer Device
    Element required
    Required: Cryo
    100T0Team DPS 159.22Ksimulation
    Best teams
    1. 2
      92T0.5Team DPS 146.75Ksimulation
    2. 3
      91T0.5Team DPS 144.88Ksimulation
  14. Knuckle Duckle
    Element required
    Required: Hydro + Electro
    100T0Team DPS 149.03Ksimulation
    Best teams
    1. 2
      96T0Team DPS 143.12Ksimulation
    2. 3
      95T0Team DPS 141.31Ksimulation
  15. Super-Heavy Landrover: Mechanized Fortress
    Element required
    Required: Pyro
    100T0Team DPS 159.22Ksimulation
    Best teams
    1. 2
      88T0.5Team DPS 140.46Ksimulation
    2. 3
      86T1Team DPS 136.64Ksimulation
  16. Guardian Blade of Drifting Snow
    Element required
    Required: Pyro
    100T0Team DPS 159.22Ksimulation
    Best teams
    1. 2
      88T0.5Team DPS 140.46Ksimulation
    2. 3
      86T1Team DPS 136.64Ksimulation

Elemental immunity

The boss is immune to its own element, so a carry of that element is unsuitable.

  1. Anemo Hypostasis
    Elemental immunity
    Immune: Anemo
    100T0Team DPS 159.22Ksimulation
    Best teams
    1. 2
      94T0.5Team DPS 149.03Ksimulation
    2. 3
      92T0.5Team DPS 146.75Ksimulation
  2. Electro Hypostasis
    Elemental immunityMultiple targets
    Immune: Electro
    100T0Team DPS 109.94Ksimulation
    Best teams
    1. 1
      100T0Team DPS 109.39Ksimulation
    2. 3
      97T0Team DPS 106.36Ksimulation
  3. Geo Hypostasis
    Elemental immunity
    Immune: Geo
    100T0Team DPS 159.22Ksimulation
    Best teams
    1. 2
      94T0.5Team DPS 149.03Ksimulation
    2. 3
      92T0.5Team DPS 146.75Ksimulation
  4. Cryo Hypostasis
    Elemental immunity
    Immune: Cryo
    100T0Team DPS 159.22Ksimulation
    Best teams
    1. 2
      94T0.5Team DPS 149.03Ksimulation
    2. 3
      90T0.5Team DPS 143.12Ksimulation
  5. Hydro Hypostasis
    Elemental immunityMultiple targets
    Immune: Hydro
    100T0Team DPS 109.39Ksimulation
    Best teams
    1. 2
      79T1.5Team DPS 85.93Ksimulation
    2. 3
      77T1.5Team DPS 84.04Ksimulation

Multiple targets

Summons helpers or breakable objects, making area damage valuable.

  1. Oceanid
    Multiple targets
    100T0Team DPS 109.94Ksimulation
    Best teams
    1. 1
      100T0Team DPS 109.39Ksimulation
    2. 3
      97T0Team DPS 106.36Ksimulation
  2. Electro Regisvine
    Multiple targets
    100T0Team DPS 109.94Ksimulation
    Best teams
    1. 1
      100T0Team DPS 109.39Ksimulation
    2. 3
      97T0Team DPS 106.36Ksimulation
  3. Perpetual Mechanical Array
    Multiple targets
    100T0Team DPS 109.94Ksimulation
    Best teams
    1. 1
      100T0Team DPS 109.39Ksimulation
    2. 3
      97T0Team DPS 106.36Ksimulation
  4. Bathysmal Vishap Herd
    Multiple targets
    100T0Team DPS 109.94Ksimulation
    Best teams
    1. 1
      100T0Team DPS 109.39Ksimulation
    2. 3
      97T0Team DPS 106.36Ksimulation
  5. Hydro Tulpa
    Multiple targets
    100T0Team DPS 109.94Ksimulation
    Best teams
    1. 1
      100T0Team DPS 109.39Ksimulation
    2. 3
      97T0Team DPS 106.36Ksimulation

Airborne and mobile

Spends part of the fight airborne or at a distance; ranged damage is needed.

  1. Thunder Manifestation
    Airborne and mobileElemental immunity
    Immune: Electro
    100T0Team DPS 141.31Ksimulation
    Best teams
    1. 2
      97T0Team DPS 137.56Ksimulation
    2. 2
      97T0Team DPS 136.54Ksimulation
  2. Setekh Wenut
    Airborne and mobileElement required
    Required: Pyro / Hydro / Electro / Cryo
    100T0Team DPS 141.31Ksimulation
    Best teams
    1. 2
      97T0Team DPS 137.56Ksimulation
    2. 2
      97T0Team DPS 136.54Ksimulation
  3. Goldflame Qucusaur Tyrant
    Airborne and mobileElement required
    Required: Hydro / Cryo / Electro
    100T0Team DPS 141.31Ksimulation
    Best teams
    1. 2
      97T0Team DPS 137.56Ksimulation
    2. 2
      97T0Team DPS 136.54Ksimulation

Healing required

Deals constant party damage or traps a character in a cocoon that only healing can remove.

  1. Radiant Moonfly
    Healing required
    100T0Team DPS 159.22Ksimulation
    Best teams
    1. 2
      92T0.5Team DPS 146.75Ksimulation
    2. 3
      91T0.5Team DPS 144.88Ksimulation
  2. Radiant Moongecko
    Healing required
    100T0Team DPS 159.22Ksimulation
    Best teams
    1. 2
      92T0.5Team DPS 146.75Ksimulation
    2. 3
      91T0.5Team DPS 144.88Ksimulation

Adaptive resistance

Adapts resistance to the most frequently used damage element.

  1. Aeonblight Drake
    Adaptive resistanceAirborne and mobile
    100T0Team DPS 141.31Ksimulation
    Best teams
    1. 2
      97T0Team DPS 137.56Ksimulation
    2. 2
      97T0Team DPS 136.54Ksimulation
  2. Watcher: Fallen Vigil
    Adaptive resistance
    100T0Team DPS 159.22Ksimulation
    Best teams
    1. 2
      94T0.5Team DPS 149.03Ksimulation
    2. 3
      92T0.5Team DPS 146.75Ksimulation

Single target

No special requirements: single-target damage decides the fight.

  1. Primo Geovishap
    Single target
    100T0Team DPS 159.22Ksimulation
    Best teams
    1. 2
      94T0.5Team DPS 149.03Ksimulation
    2. 3
      92T0.5Team DPS 146.75Ksimulation
  2. Maguu Kenki
    Single target
    100T0Team DPS 159.22Ksimulation
    Best teams
    1. 2
      94T0.5Team DPS 149.03Ksimulation
    2. 3
      92T0.5Team DPS 146.75Ksimulation
  3. Ruin Serpent
    Single target
    100T0Team DPS 159.22Ksimulation
    Best teams
    1. 2
      94T0.5Team DPS 149.03Ksimulation
    2. 3
      92T0.5Team DPS 146.75Ksimulation
  4. Iniquitous Baptist
    Single target
    100T0Team DPS 159.22Ksimulation
    Best teams
    1. 2
      94T0.5Team DPS 149.03Ksimulation
    2. 3
      92T0.5Team DPS 146.75Ksimulation
  5. Solitary Suanni
    Single target
    100T0Team DPS 159.22Ksimulation
    Best teams
    1. 2
      94T0.5Team DPS 149.03Ksimulation
    2. 3
      92T0.5Team DPS 146.75Ksimulation
  6. Secret Source Automaton: Configuration Device
    Single target
    100T0Team DPS 159.22Ksimulation
    Best teams
    1. 2
      94T0.5Team DPS 149.03Ksimulation
    2. 3
      92T0.5Team DPS 146.75Ksimulation
  7. Lava Dragon Statue
    Single target
    100T0Team DPS 159.22Ksimulation
    Best teams
    1. 2
      94T0.5Team DPS 149.03Ksimulation
    2. 3
      92T0.5Team DPS 146.75Ksimulation

Mechanics follow tips on the official HoYoLAB wiki. Ranged combat means a carry with a bow or catalyst; healing uses expert sustain ratings; Nightsoul, lunar and stellar reactions, Pneuma and Ousia are identified from character talents.

Exploration

  1. 1
    100
    Movement:Fast movement with a skillMovement over waterGathering:Local specialties on the mini-mapUtility:Special utility outside combat
  2. 2
    ChascaT1.5
    75
    Movement:FlightRise into the airUtility:Special utility outside combat
  3. 3
    69
    Movement:Fast movement with a skillMovement over waterConvenience:Crafting
  4. 3
    69
    Movement:Fast movement with a skillMovement over waterConvenience:Crafting
  5. 3
    69
    Movement:FlightRise into the airConvenience:Crafting
  6. 6
    63
    Movement:Rise into the airGathering:Local specialties on the mini-mapUtility:Special utility outside combat
  7. 7
    50
    Movement:Rise into the airSprinting: −20% stamina use
  8. 7
    50
    Movement:Fast movement with a skillGathering:Does not startle animals
  9. 7
    50
    Movement:Fast movement with a skillUtility:Special utility outside combat
  10. 7
    50
    Movement:Fast movement with a skillGathering:Does not startle animals
  11. 7
    50
    Movement:Rise into the airGliding: −20% stamina use
  12. 7
    50
    Movement:Rise into the airGliding: +15% speed
  13. 7
    50
    Movement:Fast movement with a skillUtility:Special utility outside combat
  14. 14
    44
    Movement:Fast movement with a skillConvenience:Expeditions
  15. 15
    38
    Movement:Rise into the airUtility:Special utility outside combat
  16. 15
    38
    Gathering:Local specialties on the mini-mapUtility:Special utility outside combat
  17. 15
    38
    Movement:Movement over waterFaster underwater
  18. 15
    38
    Movement:Gliding: +15% speedUtility:Special utility outside combat
  19. 15
    38
    Movement:Flight
  20. 20
    25
    Gathering:Local specialties on the mini-map
  21. 20
    25
    Gathering:Local specialties on the mini-map
  22. 20
    25
    Movement:Gliding: −20% stamina use
  23. 20
    25
    Movement:Climbing: −20% stamina use
  24. 20
    25
    Movement:Sprinting: −20% stamina use
  25. 20
    25
    Gathering:Local specialties on the mini-map
  26. 20
    25
    Movement:Gliding: −20% stamina use
  27. 20
    25
    Gathering:Local specialties on the mini-map
  28. 20
    25
    Gathering:Local specialties on the mini-map
  29. 20
    25
    Movement:Sprinting: −20% stamina use
  30. 20
    25
    Gathering:Local specialties on the mini-map
  31. 20
    25
    Gathering:Local specialties on the mini-map
  32. 20
    25
    Gathering:Local specialties on the mini-map
  33. 20
    25
    Gathering:Local specialties on the mini-map
  34. 20
    25
    Gathering:Remote or bonus gathering
  35. 20
    25
    Gathering:Local specialties on the mini-map
  36. 20
    25
    Gathering:Local specialties on the mini-map
  37. 20
    25
    Movement:Sprinting: −20% stamina use
  38. 20
    25
    Gathering:Local specialties on the mini-map
  39. 20
    25
    Movement:Sprinting: −20% stamina use
  40. 20
    25
    Gathering:Local specialties on the mini-map
  41. 20
    25
    Movement:Movement over water
  42. 20
    25
    Movement:Climbing: −20% stamina use
  43. 20
    25
    Gathering:Local specialties on the mini-map
  44. 44
    19
    Movement:Movement speed by day or nightConvenience:Cooking
  45. 44
    19
    Utility:Special utility outside combatConvenience:Cooking
  46. 44
    19
    Gathering:Does not startle animalsConvenience:Cooking
  47. 47
    13
    Gathering:Does not startle animals
  48. 47
    13
    Utility:Special utility outside combat
  49. 47
    13
    Movement:Swimming: less stamina use
  50. 47
    13
    Movement:Movement speed by day or night
  51. 47
    13
    Utility:Special utility outside combat
  52. 47
    13
    Movement:Movement speed by day or night
  53. 47
    13
    Movement:Movement speed by day or night
  54. 47
    13
    Movement:Swimming: less stamina use
  55. 47
    13
    Utility:Special utility outside combat
  56. 47
    13
    Movement:Movement speed by day or night
  57. 47
    13
    Utility:Special utility outside combat
  58. 47
    IfaT4
    13
    Utility:Special utility outside combat
  59. 47
    13
    Movement:Movement speed by day or night
  60. 47
    13
    Gathering:Does not startle animals
  61. 47
    13
    Gathering:Ore on the mini-map
  62. 47
    13
    Movement:Swimming: less stamina use
  63. 47
    13
    Utility:Special utility outside combat
  64. 47
    13
    Gathering:Ore on the mini-map
  65. 47
    13
    Movement:Movement speed by day or night
  66. 47
    13
    Utility:Special utility outside combat
  67. 47
    13
    Movement:Swimming: less stamina use
  68. 47
    13
    Utility:Special utility outside combat
  69. 69
    6
    Convenience:Crafting
  70. 69
    6
    Convenience:Crafting
  71. 69
    6
    Convenience:Crafting
  72. 69
    6
    Convenience:Cooking
  73. 69
    6
    Convenience:Expeditions
  74. 69
    6
    Convenience:Expeditions
  75. 69
    6
    Convenience:Expeditions
  76. 69
    6
    Convenience:Crafting
  77. 69
    6
    Convenience:Crafting
  78. 69
    6
    Convenience:Expeditions
  79. 69
    6
    Convenience:Cooking
  80. 69
    6
    Convenience:Crafting
  81. 69
    6
    Convenience:Expeditions
  82. 69
    6
    Convenience:Expeditions
  83. 69
    6
    Convenience:Crafting
  84. 69
    6
    Convenience:Cooking
  85. 69
    6
    Convenience:Cooking
  86. 69
    6
    Convenience:Expeditions
  87. 69
    6
    Convenience:Cooking
  88. 69
    6
    Convenience:Cooking
  89. 69
    6
    Convenience:Crafting
  90. 69
    6
    Convenience:Expeditions
  91. 69
    6
    Convenience:Expeditions
  92. 69
    6
    Convenience:Expeditions
  93. 69
    6
    Convenience:Crafting
  94. 69
    6
    Convenience:Crafting
  95. 69
    6
    Convenience:Expeditions
  96. 69
    6
    Convenience:Expeditions
  97. 69
    6
    Convenience:Cooking
  98. 69
    6
    Convenience:Cooking
  99. 69
    6
    Convenience:Crafting
  100. 69
    6
    Convenience:Crafting
  101. 69
    6
    Convenience:Expeditions
  102. 69
    6
    Convenience:Crafting
  103. 69
    6
    Convenience:Crafting
  104. 69
    6
    Convenience:Expeditions
  105. 69
    6
    Convenience:Crafting
  106. 69
    6
    Convenience:Cooking
  107. 69
    6
    Convenience:Crafting
  108. 69
    6
    Convenience:Cooking
  109. 69
    6
    Convenience:Crafting
  110. 69
    6
    Convenience:Crafting
  111. 69
    6
    Convenience:Cooking
  112. 69
    6
    Convenience:Cooking
  113. 69
    6
    Convenience:Crafting

Points: skill-based movement 2–3, party passives 1–2, gathering 1–2, utility 1, convenience 0.5. Sources: character passives from game data; movement skills are tagged manually.

How we calculate

  • The rating uses open simulations from the KQM database run with gcsim.
  • Baseline: 5★ at C0 with R1 weapons, 4★ at C6 with R5 weapons; level 90, talents 9/9/9 and KQM standards.
  • Carry and sub-DPS use their own damage. Roles are rated separately.
  • Support is rated through pairs of teams differing only in that support: how much higher the damage is than with an average support in the same slot (14,079 pairs)
  • Teams with characters missing from the KQM database are simulated by us with the same gcsim and KQM-standard substat optimization (8 teams). These rotations are not yet reviewed by the community, so they only appear in team lists and do not change role scores
  • Final role score: 60% from our gcsim simulations and 40% from the average of external tier lists (Prydwen by role, WotPack, Game8 and Pocket Gamer). Without a simulation, only tier lists count. Scales: Prydwen T0 — 100 … T5 — 40; WotPack S+ — 95 … D — 40.
  • The C0/C1/C2 and “+ 5★ weapon” switches multiply character scores by team damage gains from our gcsim simulations (as in “Is it worth pulling”) and recalculate ranks. Constellations apply only to 5★ characters; weapons apply to anyone with simulation data. Constellation and weapon gains were simulated separately and are multiplied together as an approximation. All scores are recalculated relative to the new leader.
  • Boss teams come from the same database, filtered for each boss's mechanics: shield element, immunity, target count, ranged combat and healing.
  • Exploration is a checklist of passives and skills outside combat, with no simulations.
  • The “Limit” shown on a row is a single-hit record from Miron MinMax's “Damage Limit” series (C6, best artifacts, team under the creator's rules). It is for reference only and does not affect the score; the creator considers older figures outdated.
  • Role score tiers: T0 from 95, T0.5 from 88, T1 from 80, T1.5 from 70, T2 from 55, T3 from 40, T4 below 40.
  • Community ELO will come later.

Data from 2026-11-03 · simulations matching the baseline: 5,330 of 6,024

Sources: Prydwen: tier list · WotPack: 7.1 tier list · Game8: 7.1 tier list · Pocket Gamer: 7.1 tier list

db.kqm.gg · gcsim.app