



Profile
The Seventh of the Fatui Harbingers, "Marionette." Interprets all phenomena through the prism of mathematics, and is an elegant lady who is never absent from a tea party.
Stats at level
Lv.- Base HP
- 13,226
- Base ATK
- 342
- Base DEF
- 752
- CRIT Rate
- 24.2%
Build patch 7.1, updated 9/28/2026
Stellar-Conduct main DPS
Weapons
- 1
 A Teaspoon of Transcendence ★★★★★Signature, 5–10% stronger than the rest
- 2
 A Thousand Blazing Suns ★★★★★
- 3
 Redhorn Stonethresher ★★★★★
- 4
 Verdict ★★★★★
- 5
 Beacon of the Reed Sea ★★★★★
- 6
 Wolf's Gravestone ★★★★★
- 7
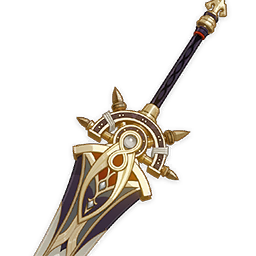 Forged by the Golden Melody ★★★★Battle Pass
- 8
 Mailed Flower ★★★★Event weapon, free
- 9
 Tidal Shadow ★★★★Craftable, at R5
Artifacts
- 1
 Disenchantment in Deep Shadow4-piece — best option
- 2
 Gilded Dreams4-piece, until you have the main set
- 3

 Gladiator's Finale + A Day Carved From Rising Winds2 + 2, temporary
In short: a Cryo DPS for the Stellar-Conduct reaction (Cryo + Electro). Her main damage comes from Charged Attacks, so Normal Attack is leveled first. Sandrone doesn't work without constant Electro on the team: the reaction only holds while both Cryo and Electro are on the field.
How she plays: her robot builds up power as she attacks, and once the bar reaches the red zone her hits get weaker. Her Skill resets the bar and deals damage itself, so the rotation alternates Charged Attacks and the Skill.
Stats: ATK 2000+: at this threshold her passive, which converts ATK into Elemental Mastery, is capped — hence ATK on the sands and goblet. Crit Rate 60–70% including all buffs, Crit DMG 180%+, Energy Recharge 120–145%. Elemental Mastery comes almost entirely from the passive, no need to build it separately.
Partners: Yae Miko is her best Electro applier, especially at C1. C6 Alyosha and C6 Beidou are strong Electro supports. Odette boosts Stellar reactions. Budget team: Beidou, Sucrose and Qiqi.
Constellations: signature weapon first. The most noticeable constellations are C1 (Stellar reaction DMG) and C2 (Crit DMG); C6 is another big boost.
In endgame right now: recommended for the first half of Abyss Floor 12 instead of Stellar Swirl; in this season's Theater she's a Special Guest.
You can also check
- KeqingMains Quick Guide — KQMEN
Guides by other authors on other sites — in-depth breakdowns written by players.
Sources: Game8, genshin.guru, Genshin-info.ru, Wotpack, genshin.gg. Texts are our own summary. Found a mistake in this build? · Improve this guide
Rotation
Stellar-Conduct
- Supports E/Q
- CA
- E
- CA
- E
- CA
- E
- Q
Legend: E — Skill, E (hold) — hold Skill, Q — Burst, M1-M2-M3 — Normal Attack string, CA — Charged Attack.
Teams







Also appears in other teams
 BETA


Video guides YouTube, plays on click
Talents

Formule Phenomenale: Self-Evident Proposition
Normal Attack Generates threads that control her weapon using formulae, performing up to 3 consecutive strikes. Charged Attack Summons the Facilitatrice Automatisee Generaliste Interactive et Omnitache, or "Fagio," and switches it to **Decoding** mode: Unleashes a sweeping fire attack on enemies in front, as well as periodically fires condensed beams, dealing AoE Cryo DMG. **Radiance: Stellar Glimmer**: The condensed beams will instead deal AoE Cryo DMG that is considered the corresponding Stellar Glimmer reaction DMG. While in Decoding mode, Fagio's **Decoding Power** will continuously increase. Firing condensed beams will also further increase its Decoding Power. When Fagio's Decoding Power reaches the maximum of 100 points, it switches to Power Overdrive mode, in which it fires at opponents with longer intervals, dealing Cryo DMG. It will be unable to switch to Decoding mode at this time. When not in Decoding mode, Fagio's Decoding Power gradually decreases. When Sandrone is off-field, she will focus on maintaining Fagio, causing its Decoding Power to decrease at 300% the original rate. Fagio exits Power Overdrive mode when its Decoding Power has decreased to under 50. Plunging Attack Plunges from midair to strike the ground below, dealing DMG to opponents along their path and causing AoE DMG on landing.
Scaling
| 1-Hit DMG | 150.8% |
|---|---|
| 2-Hit DMG | 132.8% |
| 3-Hit DMG | 203.2% |
| Charged Attack Sweeping Fire DMG | 85.0% |
| Charged Attack Condensed Beam DMG | 242.3% |
| Charged Attack Condensed Beam Stellar-Conduct DMG | 161.5% |
| Charged Attack Condensed Beam Stellar Swirl DMG | 242.3% |
| DMG When in Power Overdrive | 85.0% |
| Plunge DMG | 147.4% |
| Low/High Plunge DMG | 295%/368% |

Formule Phenomenale: Differential Analysis
With her impeccable, ladylike poise, Sandrone boards the Tea Party Tactical Assault Hovermech and hovers forward for 6s. During this time, Sandrone can control the travel direction of the craft. Pressing Sprint consumes 10 Stamina and launches her into an elegant high-speed hover mode, in which she will move even faster at the cost of 15 Stamina per second. When Sandrone starts hovering, if there are opponents nearby, she will also summon a Prismatic Resonance Cannon and fire 2 Prism Shots at any opponents who have yet to cool down, dealing Cryo DMG. **Radiance: Stellar Glimmer**: The second Prism Shot will instead deal Cryo DMG that is considered the corresponding Stellar Glimmer reaction DMG. When on the Tea Party Tactical Assault Hovermech, Sandrone will also elegantly and quietly repair Fagio, causing **Decoding Power** to swiftly decrease.
Scaling
| Prism Shot DMG | 58.3% |
|---|---|
| Prism Shot Stellar-Conduct DMG | 38.9% |
| Prism Shot Stellar Swirl DMG | 58.3% |
| CD | 4.0s |

Formule Phenomenale: Q.E.D.
In line with established ladylike behavior, Sandrone summons a large number of Prismatic Resonance Cannons for a frontal bombardment before firing on her foes with a Convective Inhibition Ray, dealing AoE Cryo DMG. **Radiance: Stellar Glimmer**: The Convective Inhibition Ray instead deals AoE Cryo DMG that is considered the corresponding Stellar Glimmer reaction DMG.
Scaling
| Bombardment DMG | 158.8% ×3 |
|---|---|
| Convective Inhibition Ray DMG | 595.4% |
| Convective Inhibition Ray Stellar-Conduct DMG | 397.0% |
| Convective Inhibition Ray Stellar Swirl DMG | 595.4% |
| CD | 15.0s |
| Energy Cost | 60 |
Passive talents

Eternal Speculation Engine
**Radiance: Stellar Glimmer**: When using the Elemental Skill **Formule Phenomenale: Differential Analysis**, if Fagio's **Decoding Power** is greater than 50, the second Prism Shot fired by Fagio at nearby opponents will deal 400% of its original DMG as Fagio's Decoding Power is decreased. Additionally, for every 10 points of Decoding Power Fagio loses, it gains 1 stack of Refined Tactics for 60s (max 10 stacks). When Sandrone uses the Elemental Burst **Formule Phenomenale: Q.E.D.** while in the Radiance: Stellar Glimmer state, all stacks of Refined Tactics are cleared, causing the Convective Inhibition Ray to deal 100% + (number of stacks cleared) × 10% of its original DMG.

A Lady's Code of Conduct
Increases Sandrone's Elemental Mastery based on her ATK. Every 100 ATK will increase her Elemental Mastery by 8. The maximum increase she can gain this way is 160.

Stellar Jubilee: Light of Rationalisme
Sandrone will enter the Radiance: Stellar-Conduct state when she is inside a **Polestar Field**, or the Radiance: Stellar Swirl state for 8s after a nearby party member triggers a Stellar Swirl reaction. When a party member triggers a Superconduct or Cryo Swirl reaction, it becomes a Stellar-Conduct or Stellar Swirl reaction instead, and the Base DMG of the aforementioned reaction is also increased by 0.7% for every 100 points of Sandrone's ATK. A maximum increase of 14% can be obtained in this way.

A Caucus Prelude and a Long Tale
When Sandrone is in the party, you will gain additional snack rewards after turning in your Daily Commissions with Katheryne.
Constellations

Morrow After the Golden Dusk
When in **Decoding** mode, Fagio's **Decoding Power** increases at a 50% lower rate, and all party members deal 30% increased Stellar Glimmer reaction DMG.

An Heiress Gazed Into the Looking-Glass
Radiance: Stellar Glimmer: Increases CRIT DMG from Charged Attack condensed beams by 40%. Also, each time a beam is fired, CRIT DMG dealt by all condensed beams fired during this **Decoding** mode period will be further increased by 20%. Max 3 stacks.

Refuse the Wake of Dusk, the Moonlit Yoke
Increases the Level of **Formule Phenomenale: Self-Evident Proposition** by 3. Maximum upgrade level is 15.

In Knowledge Lies the World's True Ground
When Sandrone deals Stellar-Conduct or Stellar Swirl DMG to an opponent, she will also summon an extra Prismatic Resonance Cannon to fire off a coordinated attack which deals Cryo DMG at 125% or 187.5% of her ATK, respectively. This DMG is considered the corresponding Stellar Glimmer reaction DMG, and the effect can occur once every 4s.

Of All Beside, She Takes No Part
Increases the Level of **Formule Phenomenale: Q.E.D.** by 3. Maximum upgrade level is 15.

Narcissus Wakes, Her Eyes Upon the Dawn
When Fagio fires a condensed beam for the third time while in **Decoding** mode, the beam becomes a more powerful Condensed Cluster Beam that fires continuously. This beam will deal up to 4 additional instances of AoE Cryo DMG at 100% of Sandrone's ATK on top of any subsequent original beam fired. Radiance: Stellar Glimmer: The Condensed Cluster Beam attack deals 4 additional instances of AoE Cryo DMG. The DMG dealt with this attack, which is considered the corresponding Stellar Glimmer reaction DMG, is equal to: Radiance: Stellar-Conduct: 80% of Sandrone's ATK. Radiance: Stellar Swirl: 120% of Sandrone's ATK. Additionally, all Stellar Glimmer reaction DMG dealt by Sandrone is **elevated** by 20%.