Electro or Stellar Glimmer is needed in fight 1, Hydro in fight 2, Geo and a healer in fight 3. From Menacing difficulty characters cannot be repeated: prepare three different teams in advance. This page was put together before the cycle started, from the official announcement and wiki data — we'll refine the teams after the first clears.
Difficulty levels
Difficulty
Enemy levels
Features
Normal
40
Open from the start, matchmaking available
Advancing
70
Open from the start, matchmaking available
Hard
90
Open from the start. During the Disturbance Outbreak it rewards artifacts for Resin
Menacing
100
Unlocks after Hard. Characters cannot repeat across fights, co-op only within your own world
Fearless
105
Enemies are greatly enhanced, bosses get new forms. Rewards only for a solo clear
Dire
110
Exalted Ones without buffs, solo only. Under 180 s — the “Sublimation” weapon appearance
Buffs and mechanics
Three fights in a row, each with its own time limit. The challenge counts once all three bosses are defeated
Exalted Ones: up to 16 characters receive buffs, and the list changes. On Dire difficulty the Exalted Ones’ buffs do not apply
Disturbance Outbreak (November 11–21): after clearing Hard or higher you can spend Resin on artifacts from a chosen domain and earn Dire Prestige
From Menacing difficulty a character cannot be used in two fights — Electro or Stellar Glimmer is needed in fight 1, Hydro in fight 2, Geo and a healer in fight 3
Rewards: 450 Primogems for the first three difficulties, the “Radiant Phantasm” weapon appearance for Dire and “Sublimation” for Dire under 180 s. This cycle both appearances gain a new style — it is granted together with the old one
Stages and enemies
Fight 1
Wavebinder
All difficulties · enhanced form on Fearless and Dire
Advantage:Stellar GlimmerElectro
Shortly after the fight starts the boss drinks from a flask and builds its Courage gauge. When it is full, he enters the Valiant state: hits harder, gains a shield and sharply raises all RES except Electro
Stellar Glimmer on the boss before the drink keeps the gauge from filling completely — he has to drink again
Electro hits drain Courage and shorten the Valiant state; Electro Stellar-Conduct DMG does it best
When the Valiant state ends, the boss takes backlash — a share of the damage the shield absorbed. Stellar reaction damage comes back harder
Boss
Wavebinder
How to clear
Stellar-Conduct — Electro plus Cryo — works best: it both disrupts the drink and drains Courage fastest
Keep attacking during the Valiant state: the damage absorbed by the shield returns to the boss as backlash
After his leaping anchor slam, Electro briefly stuns the boss — that's a damage window
The anchor hits very hard: keep your distance or dodge the swings
All difficulties · enhanced form on Fearless and Dire
Advantage:HydroPyro — weak
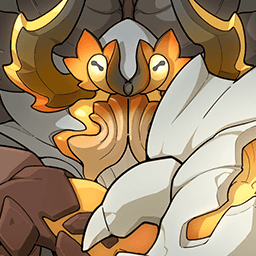
Molten Crown: the twin horns are charged with Pyro and greatly raise all of the boss's RES. When the horns' Pyro is exhausted, they break, the boss loses part of its HP and stays unprotected until the horns regrow
The boss summons up to three Sternshield Crabs that feed the horns. The crabs are also quenched with elements: a defeated crab slams into the Emperor, removes part of the horns' charge and deals damage — the more Hydro DMG it took, the more
Radiant Coronation: the boss charges a powerful AoE attack. Breaking the horns interrupts it
Boss
Emperor of Fire and Iron
How to clear
You need frequent Hydro, ideally AoE: it quenches both the horns and the crabs
Take out the crabs first — each one damages the Emperor and brings the horn break closer
During some attacks the horns dip low — that's when they are easiest to hit
Don't bring Pyro characters: the horns are immune to Pyro
All difficulties · enhanced form on Fearless and Dire
Advantage:GeoHealers
The Moongecko leaves a Moonstone Anchor with a multi-layered Geo ward on the arena, leaps to high ground and charges a powerful AoE attack. Break the Anchor to interrupt the charge and make the boss lose a large share of HP; Geo DMG dealt to the Anchor increases it
Fail to break the Anchor in time and the boss hits the whole arena and raises all RES
Radiant Cocoon: captured characters lose HP, deal half damage, receive less healing and cannot crit. Heal a character to full HP and the Cocoon drops, briefly granting a DMG and CRIT Rate bonus
While anyone is in a Cocoon, the boss has increased Geo RES
Boss
Radiant Moongecko
How to clear
Geo attacks, Lunar-Crystallize, claymores and Plunging Attacks strip the Anchor's ward fastest
Bring a healer with a big burst heal (Kokomi, Xianyun, Barbara): healing is reduced inside the Cocoon, so small ticks won't clear it. Bennett only heals up to 70% HP and doesn't work here
This team is needed last — on Menacing and above, don't spend your Geo characters and healer in the earlier fights


 Wavebinder