



Profile
Lady Guuji of the Grand Narukami Shrine. Also serves as the editor-in-chief of Yae Publishing House. Unimaginable intelligence and cunning are hidden under her beautiful appearance.
Stats at level
Lv.- Base HP
- 10,372
- Base ATK
- 340
- Base DEF
- 569
- CRIT Rate
- 24.2%
Build patch 7.1, updated 9/28/2026
Sub DPS, off-field Electro
Weapons
- 1
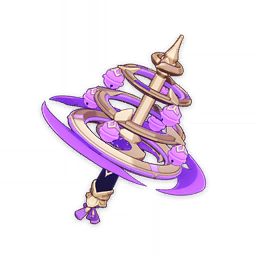 Kagura's Verity ★★★★★Signature
- 2
 A Thousand Floating Dreams ★★★★★For Quicken
- 3
 Skyward Atlas ★★★★★
- 4
 Lost Prayer to the Sacred Winds ★★★★★
- 5
 The Widsith ★★★★
- 6
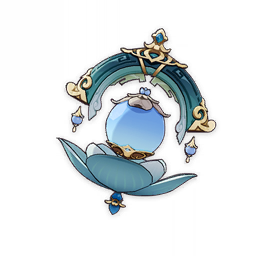 Sacrificial Jade ★★★★
- 7
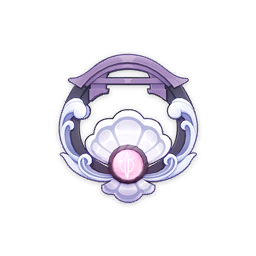 Oathsworn Eye ★★★★R5, budget
Artifacts
- 1
 Disenchantment in Deep Shadow4-piece — in Stellar-Conduct teams
- 2
 Golden Troupe4-piece — outside Stellar teams
- 3
 Gilded Dreams4-piece, for Quicken
- 4

 Gladiator's Finale + Thundering Fury2 + 2, temporary
In short: the three Skill totems deal steady off-field Electro damage; almost all her damage is the Skill, so it's leveled first. Her main role now is the Electro applier in Stellar-Conduct: she's the best option for Sandrone.
The build depends on the team: in Stellar-Conduct the reaction scales with ATK, hence an ATK goblet and the Disenchantment in Deep Shadow set. Outside Stellar teams — Electro goblet and Golden Troupe, or Gilded Dreams in Quicken.
Stats: ATK 2000+, Energy Recharge 130–140% with a second Electro on the team (more without one), Crit Rate 60–70%: her off-field damage procs often, so crit pays off. Crit DMG as much as you can, 175%+.
Constellations: C1 greatly reduces her energy needs and noticeably strengthens her in Stellar-Conduct; C2 strengthens the totems.
You can also check
- KeqingMains Quick Guide — KQMEN
Guides by other authors on other sites — in-depth breakdowns written by players.
Sources: Game8, genshin.guru, Genshin-info.ru, Wotpack, genshin.gg. Texts are our own summary. Found a mistake in this build? · Improve this guide
Rotation
- E
- E
- E
- switch
- Q
- E
- E
- E
Legend: E — Skill, E (hold) — hold Skill, Q — Burst, M1-M2-M3 — Normal Attack string, CA — Charged Attack.
Teams





Alhaitham Quicken



Overloaded


Kokomi Electro-Charged



Also appears in other teams






 BETA





 BETA

Wriothesley Stellar-Conduct
Recommended in: Nicole, Odette, Wriothesley






Is it worth pulling team damage gain, gcsim simulation
How much the whole team's damage grows compared to C0 with Solar Pearl (R5). Gains are cumulative: C2 includes C1.
If you pick one, the weapon gives more — and weapon banner pulls don't use up your character pity either.
How we calculated
The team comes from the open gcsim simulation database — the one closest to the teams in this guide. Only this character was changed: constellation and weapon. Teammates, artifact sets and rotation stay as in the original simulation; the whole team's substats are optimized to KQM standards separately for each weapon. C0 with Solar Pearl: 63,674 damage per second.
The gain depends on the team and investment: treat it as a guideline, not an exact number for your account. Original simulation · gcsim 4eda9fc, 2026-10-17
Talents

Spiritfox Sin-Eater
Normal Attack Summons forth kitsune spirits, initiating a maximum of 3 attacks that deal Electro DMG. Charged Attack Consumes a certain amount of Stamina to deal AoE Electro DMG after a short casting time. Plunging Attack Plunges towards the ground from mid-air, damaging all opponents in her path with thunderous might. Deals AoE Electro DMG upon impact with the ground.
Scaling
| 1-Hit DMG | 71.4% |
|---|---|
| 2-Hit DMG | 69.3% |
| 3-Hit DMG | 102.4% |
| Charged Attack DMG | 257.2% |
| Charged Attack Stamina Cost | 50.0 |
| Plunge DMG | 112.3% |
| Low/High Plunge DMG | 225%/281% |

Yakan Evocation: Sesshou Sakura
To Yae, such dull tasks as can be accomplished by driving spirits out need not be done personally. Moves swiftly, leaving a Sesshou Sakura behind. Sesshou Sakura Has the following properties: · Periodically strikes one nearby opponent with lightning, dealing Electro DMG · When there are other Sesshou Sakura nearby, their level will increase, boosting the DMG dealt by these lightning strikes. This skill has three charges. A maximum of 3 Sesshou Sakura can exist simultaneously. The initial level of each Sesshou Sakura is 1, and the initial highest level each sakura can reach is 3. If a new Sesshou Sakura is created too close to an existing one, the existing one will be destroyed.
Scaling
| Sesshou Sakura DMG: Level 1 | 109.2% |
|---|---|
| Sesshou Sakura DMG: Level 2 | 136.5% |
| Sesshou Sakura DMG: Level 3 | 170.6% |
| Sesshou Sakura DMG: Level 4 | 213.3% |
| Duration | 14.0s |
| CD | 4.0s |

Great Secret Art: Tenko Kenshin
Legends of "kitsunetsuki," or the manifestation of a kitsune's might, are common in Inazuma's folktales. One that particularly captures the imagination is that of the Sky Kitsune, said to cause lightning to fall down upon the foes of the Grand Narukami Shrine. Summons a lightning strike, dealing AoE Electro DMG. When she uses this skill, Yae Miko will unseal nearby Sesshou Sakura, destroying their outer forms and transforming them into Tenko Thunderbolts that descend from the skies, dealing AoE Electro DMG. Each Sesshou Sakura destroyed in this way will create one Tenko Thunderbolt.
Scaling
| Skill DMG | 468% |
|---|---|
| Tenko Thunderbolt DMG | 601% |
| CD | 22.0s |
| Energy Cost | 90 |
Passive talents

The Shrine's Sacred Shade
When casting Great Secret Art: Tenko Kenshin, each Sesshou Sakura destroyed resets the cooldown for 1 charge of Yakan Evocation: Sesshou Sakura.

Enlightened Blessing
Every point of Elemental Mastery Yae Miko possesses will increase Sesshou Sakura DMG by 0.15%.

Meditations of a Yako
Has a 25% chance to get 1 regional Character Talent Material (base material excluded) when crafting. The rarity is that of the base material.
Constellations

Yakan Offering
Each time Great Secret Art: Tenko Kenshin activates a Tenko Thunderbolt, Yae Miko will restore 8 Elemental Energy for herself.

Fox's Mooncall
Sesshou Sakura start at Level 2 when created, their max level is increased to 4, and their attack range is increased by 60%.

The Seven Glamours
Increases the Level of Yakan Evocation: Sesshou Sakura by 3. Maximum upgrade level is 15.

Sakura Channeling
When Sesshou Sakura lightning hits opponents, the Electro DMG Bonus of all nearby party members is increased by 20% for 5s.

Mischievous Teasing
Increases the Level of Great Secret Art: Tenko Kenshin by 3. Maximum upgrade level is 15.

Forbidden Art: Daisesshou
The Sesshou Sakura's attacks will ignore 60% of the opponents' DEF.