
Faruzan
★★★★AnemoBow
patch 7.1, updated 10/10/2026Anemo and Stellar Swirl support
Weapons
- 1
 Elegy for the EndBest option: ER and a team buff
- 2
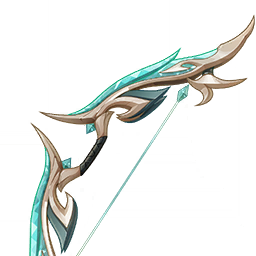 Breezeborne RefrainFor Stellar Swirl: Energy Recharge and a Stellar Glimmer bonus
- 3
 Favonius WarbowBest free option: energy particles, needs Crit Rate
- 4
 Sacrificial BowA second Skill per cooldown — more vortices and particles
- 5
 Skyward Harp
- 6
 End of the LineFree option with ER
- 7
 Fading TwilightFree option
- 8
 The StringlessFor Swirl teams: Elemental Mastery
Artifacts
- 1
 Tenacity of the Millelith4-piece — best option at C6: her Skill hits reliably and keeps +20% ATK on the team
- 2
 Viridescent Venerer4-piece — best option before C6 in Swirl teams, if nobody else holds Viridescent Venerer
- 3
 Noblesse Oblige4-piece — for teams without reactions, if nobody else in the team uses Noblesse Oblige
- 4
 Emblem of Severed Fate4-piece, if you're short on Energy: +20% ER from the 2-piece
- 5
 Viridescent Venerer + Gladiator's Finale2 + 2, until you've collected 4 pieces of the right set
Stats and talents
- Sands
- Energy Recharge / ATK%
- Goblet
- Anemo DMG Bonus
- Circlet
- CRIT Rate / DMG
Substats: Energy Recharge > CRIT Rate / DMG > ATK%
Talent priority: Elemental Burst > Elemental Skill > Normal Attack
Teams



Mizuki Stellar Swirl


Xiao team



Wanderer team



Shikanoin Heizou team


Wanderer Electro-Charged


Rotation
Q → E → charged shot → switch
Burst first — the buff and the resistance shred last as long as the Polyhedron is on the field. Skill plus a charged shot fires a Hurricane Arrow: its vortex also shreds resistance and generates particles. Before C6, use the Skill again on cooldown for energy; at C6 you can swap out right after Q.
Detailed guide
In short: Faruzan is a narrow but very strong Anemo support. She doesn't deal much damage herself, but her Burst gives the team an Anemo DMG Bonus and cuts enemies' Anemo RES by 30%. Since 7.1 she's also one of the best buffers for Stellar Swirl — together with Vesna or Mizuki.
How she plays: her Burst, The Wind's Secret Ways, places the Dazzling Polyhedron for 12 seconds. It moves along a triangle and releases a Whirlwind Pulse at each corner: the pulse lowers enemies' Anemo RES and gives allies Prayerful Wind's Benefit — an Anemo DMG Bonus (about 32% at talent level 10). While the Benefit is active, an ally's first Anemo hit deals extra damage equal to 32% of Faruzan's Base ATK (her passive Lost Wisdom of the Seven Caverns), once every 0.8 s. Her Skill, Wind Realm of Nasamjnin, charges her next Aimed Shot into a Hurricane Arrow, and its Pressurized Collapse vortex also shreds resistance and pulls enemies in.
Energy: Faruzan's main problem. Her Burst costs 80 Energy and her Skill makes few particles, so before C6 she needs a lot of Energy Recharge and a weapon with ER or particle generation.
Artifacts: before C6 the best pick is Viridescent Venerer: Faruzan already sits in Anemo damage teams, and the set adds RES shred for the Swirled element. If another Anemo character already holds Viridescent or the team doesn't rely on reactions, go Noblesse Oblige (+20% team ATK after her Burst). Emblem of Severed Fate is the fallback when you can't reach enough Recharge in substats. Until you've collected the right set, a 2 + 2 of Viridescent Venerer and Gladiator's Finale works.
Stats: Energy Recharge — 250–300% before C6 and about 200% at C6. Everything else is secondary: with Favonius Warbow she needs at least 50% Crit Rate so the weapon procs; for personal damage, Anemo goblet and a crit circlet. Talents: Burst first (it raises the Anemo DMG Bonus), then Skill; Normal Attack isn't needed.
Partners: in Stellar Swirl — Vesna, Odette and Vodyanitsa, or Mizuki with the Cryo Traveler. Among classic Anemo DPS — Xiao (with Furina and Xianyun) and Wanderer (with Xiangling and Bennett). Outside Anemo teams she's nearly useless.
Constellations: C6 is the key one and changes her role: allies under the Benefit get +40% Crit DMG on Anemo attacks, and the active character's hits apply Pressurized Collapse on their own once every 3 s — the vortices start shredding resistance and generating energy consistently. That's why Tenacity of the Millelith is her best set at C6: her Skill always hits and keeps the ATK buff on the whole team. C2 keeps the Polyhedron 6 seconds longer, C4 returns up to 4 Energy per vortex, and C1 gives a second Hurricane Arrow per Skill.
Weaknesses: before C6 — serious energy problems and little value outside Anemo teams. Her full potential only unlocks at C6, and her buff only helps characters who deal Anemo damage.