Stellar-Conduct



Alyosha preferably at C6

Stellar-Conduct main DPS
 A Teaspoon of TranscendenceSignature, 5–10% stronger than the rest
 A Thousand Blazing Suns
 Redhorn Stonethresher
 Verdict
 Beacon of the Reed Sea
 Wolf's Gravestone
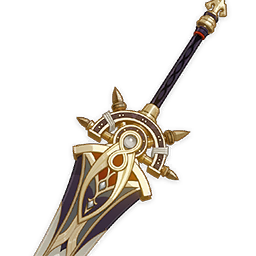 Forged by the Golden MelodyBattle Pass
 Mailed FlowerEvent weapon, free
 Tidal ShadowCraftable, at R5
 Disenchantment in Deep Shadow4-piece — best option
 Gilded Dreams4-piece, until you have the main set

 Gladiator's Finale + A Day Carved From Rising Winds2 + 2, temporary
Substats: CRIT DMG > CRIT Rate > ATK% > Energy Recharge > Elemental Mastery
Talent priority: Normal Attack > Elemental Burst > Elemental Skill
Alyosha preferably at C6
Beidou preferably at C6
Supports E/Q → CA → E → CA → E → CA → E → Q
Hold the Charged Attack until the gauge fills; the Skill resets the robot's power bar.
In short: a Cryo DPS for the Stellar-Conduct reaction (Cryo + Electro). Her main damage comes from Charged Attacks, so Normal Attack is leveled first. Sandrone doesn't work without constant Electro on the team: the reaction only holds while both Cryo and Electro are on the field.
How she plays: her robot builds up power as she attacks, and once the bar reaches the red zone her hits get weaker. Her Skill resets the bar and deals damage itself, so the rotation alternates Charged Attacks and the Skill.
Stats: ATK 2000+: at this threshold her passive, which converts ATK into Elemental Mastery, is capped — hence ATK on the sands and goblet. Crit Rate 60–70% including all buffs, Crit DMG 180%+, Energy Recharge 120–145%. Elemental Mastery comes almost entirely from the passive, no need to build it separately.
Partners: Yae Miko is her best Electro applier, especially at C1. C6 Alyosha and C6 Beidou are strong Electro supports. Odette boosts Stellar reactions. Budget team: Beidou, Sucrose and Qiqi.
Constellations: signature weapon first. The most noticeable constellations are C1 (Stellar reaction DMG) and C2 (Crit DMG); C6 is another big boost.
In endgame right now: recommended for the first half of Abyss Floor 12 instead of Stellar Swirl; in this season's Theater she's a Special Guest.